

I enjoy making cards as a hobby. It began when I shopped for cards one year and found most of them were $5.99 and up. I had a lot of craft supplies on hand and decided to try making cards.
You may have seen a meme which says something like why spend $6 on a card when you can spend $72.95 on craft supplies to make cards. 🙂 One can easily get carried away, as there are so many tools and materials with which to make cards these days. But some of the nicest cards are the most simple.
This isn’t a craft blog, but as I discussed these things with a friend recently, I thought some of you might be interested as well.
I confess I have an embarrassment of riches when it comes to craft supplies. My family often gets me either craft things or gift cards to Hobby Lobby. I can’t receive some of the “usual” gifts for moms. Scented things give me a headache, so candles, perfumes, lotions, soaps, etc, are out. I prefer to buy my own clothes. I enjoy inexpensive jewelry, but have more than I can use as it is. I used to ask for books, but most of my books are ebooks now. So craft supplies and gift cards are my main gifts.
Hobby Lobby frequently has some of their papercrafting supplies on sale for 40% off, so I make the most of my gift cards then.
My husband bought me a Cricut machine some years ago, which plugs into the computer and accesses their Design Space. You can look up specific projects or search for images. When you find what you want, the machine will divide the image up into different layers, which you can then set it to cut. The Cricut is a marvel, and I still don’t know a lot of what it can do. But it is also expensive. I almost feel guilty for having one, or feel I should have an Etsy shop or something to justify my having a Cricut. But I thankfully accept it from my husband’s generosity.
However, I want to encourage you that you can make nice cards without a machine or hoards of supplies.
Getting ideas
I have a Pinterest board for homemade cards, divided into categories. Some of the pins take you to the site of the person who made the card with their instructions. However, most don’t contain instructions. I try not to copy an idea exactly if the person who made it is trying to sell it. But I might let the idea inspire me.
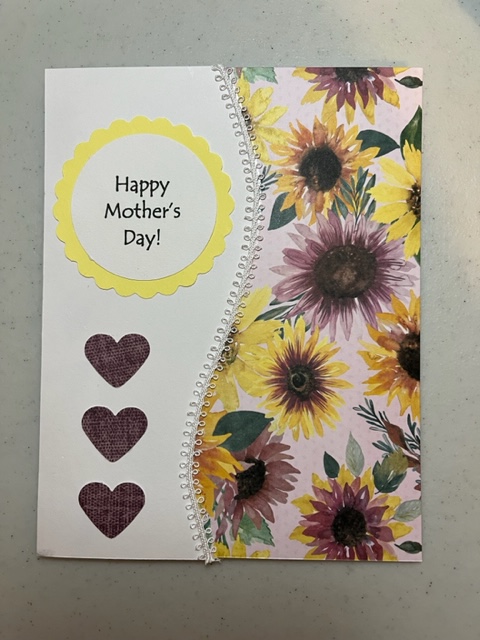
I take the interests of the recipient in mind. For instance, my daughter-in-law likes sunflowers, daisies, and the color purple. My oldest son likes foxes and has a cat. My husband is handy and like camping and fishing. My youngest son is into gaming and technology. So I’ll try to find or come up with an idea incorporating their interests.
I also look through my decorative papers, trims, and stickers, and sometimes an idea will evolve.
Tools
I’m blessed with a lot of tools accumulated through the years, but nice cards can be made with the barest supplies.
I usually use scrapbooking paper as a background, but that’s not always necessary. Hobby Lobby and Michael’s both sell individual sheets of decorative paper as well as pads of themed paper. I’ve gotten some pads of decorative paper on Amazon as well.
Decorative scissors provide an interesting edging.
Lace, ribbons, paper scraps, or store-bought trims add special touches and sometimes provide a cover for overlapping papers. Most of these trims are adhesive, which helps a lot.

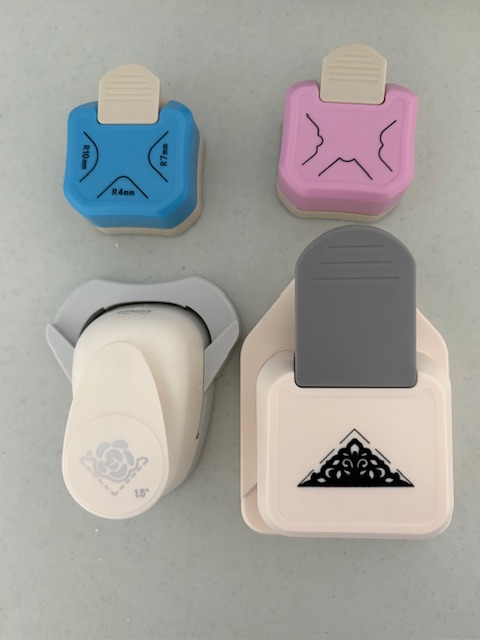
Punches can be expensive. When I haven’t had just the right size, I’ve used stencils instead. I’m not good at cutting things out on a line, so they edges aren’t as sharp as with a punch. But they’ll do. Sometimes a wobbly edge can be covered up with trim or a sticker.
Some of my favorite punches are corner cutters.
You don’t have to have wording on the front of a card. I do on most of mine. Since my writing is not the best, I usually use the computer for whatever I want the front to say, print it, then use the paper cutter, punches, or stencils to cut it out. But I have also used stamps and stickers. I have some lettering resources to try to teach myself to write clearly enough for the front of a card, but haven’t had time to delve into them yet.
I just use a basic craft glue stick most of the time. My oldest son got me a sticker-maker, which I usually use for the inside sentiments. The glue it uses is really strong with little hope of repositioning. But the basic glue stick can be moved around a little before it dries.
Sample cards
All of these have appeared on the blog before.
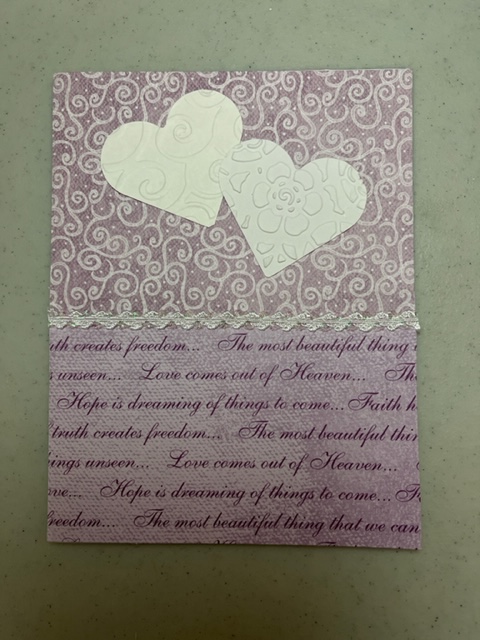
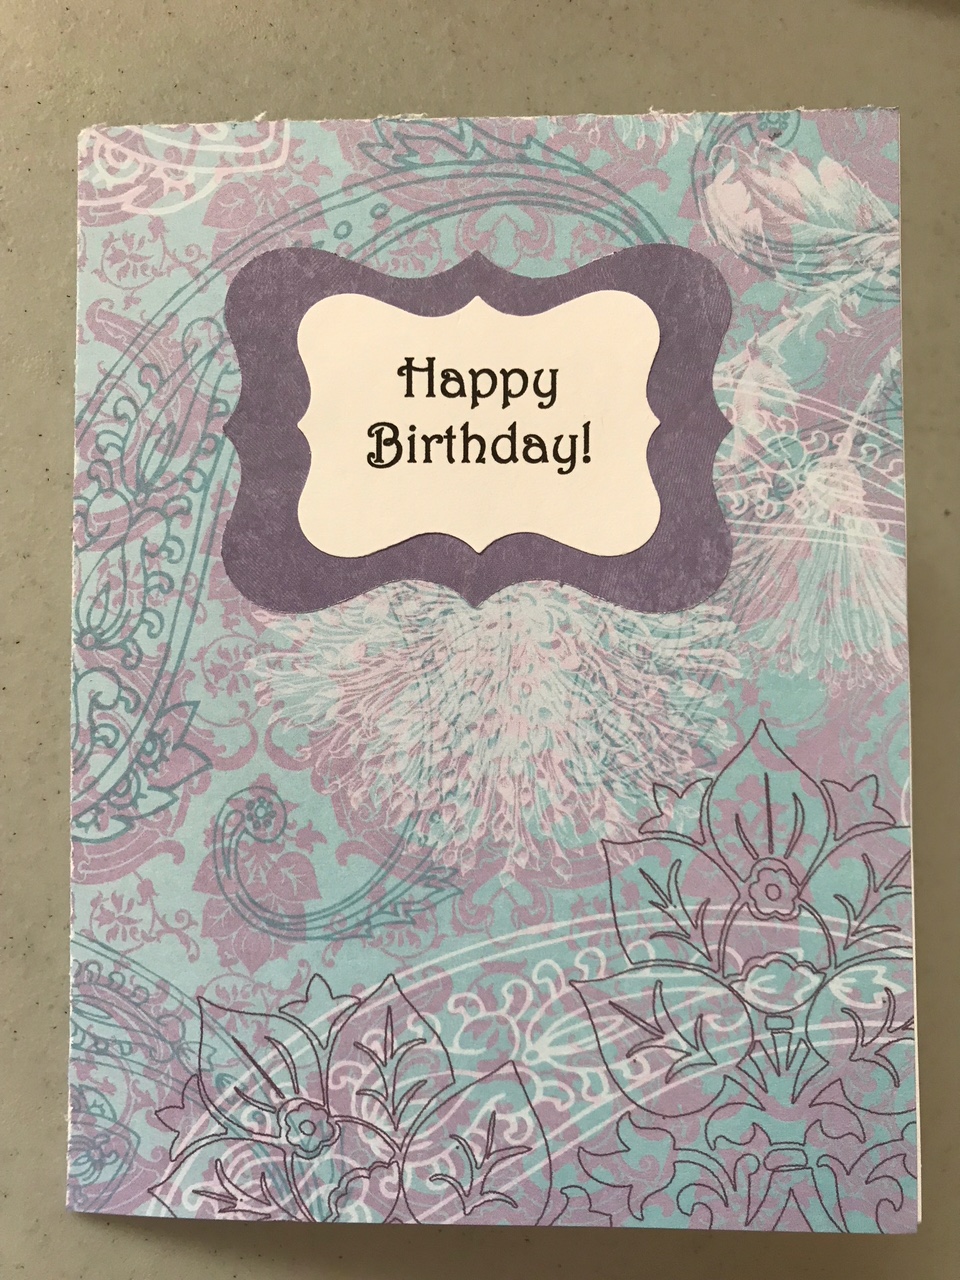
One of the simplest card ideas has a decorative background of scrapbooking paper and a simple saying surrounded by a contrasting or solid color:
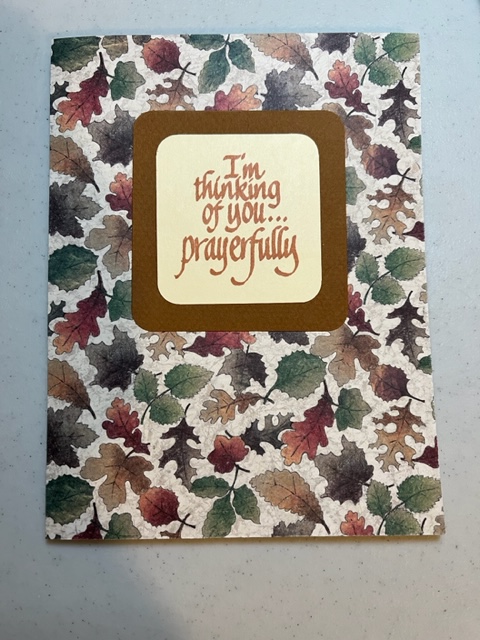
The words here were done with a stamp. The corners of both the saying and the paper around it were rounded with a corner cutter.
This card takes the decoration one step further:
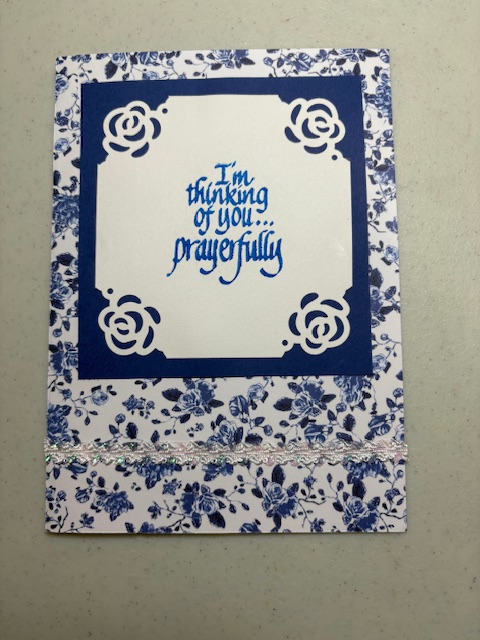
The roses on the corners of the saying were done with a decorative punch. I added a piece of lacy sticker trim across the bottom.
You could also use coordinating papers on a card, and cover the overlap with a bit of trim.
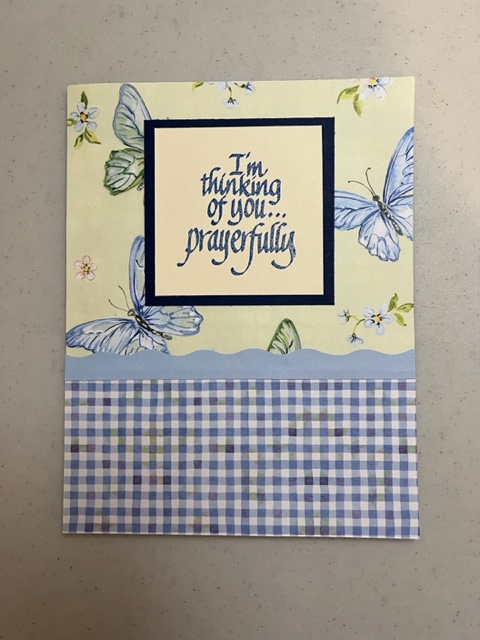
The trim above was made with colored paper and decorative scissors.
This one takes things a step further:
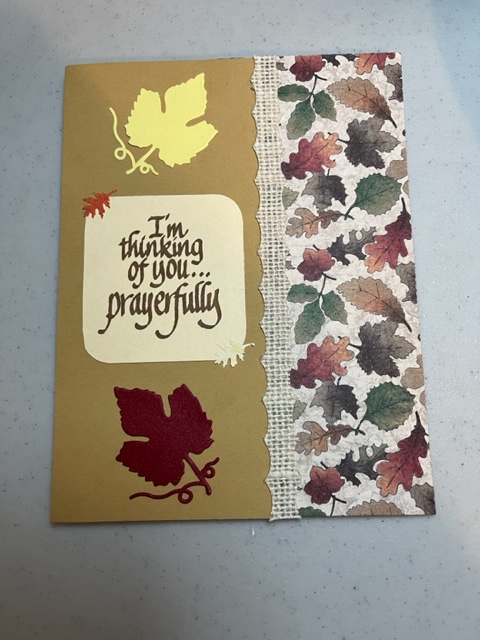
The burlap trim is another sticker. The two leaves were cut out with another device, a Cuttlebug. But there are also leaf punches or stencils one could use. If I remember correctly, the small leaf stickers were used to cover up a mistake on the corners.
And this takes the same basic idea even further:
The cards above and below use two punches of different sizes, which could also be done with stencils:
You could also use simple shapes. I think I used the Cricut for the monitor here, but it could easily be done without it:
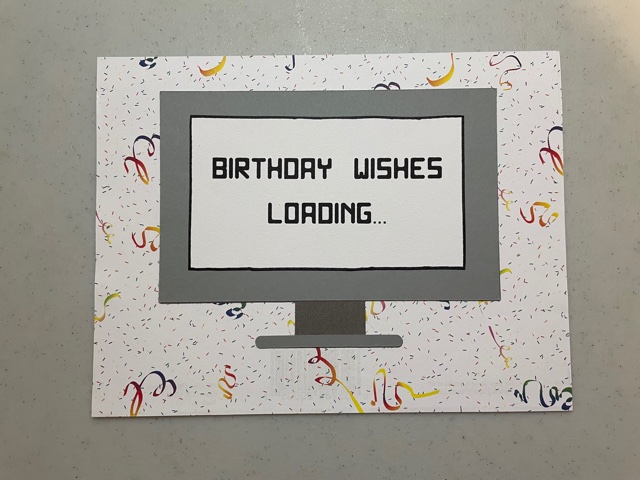
I found a font online that looked like computer typing and used it here.
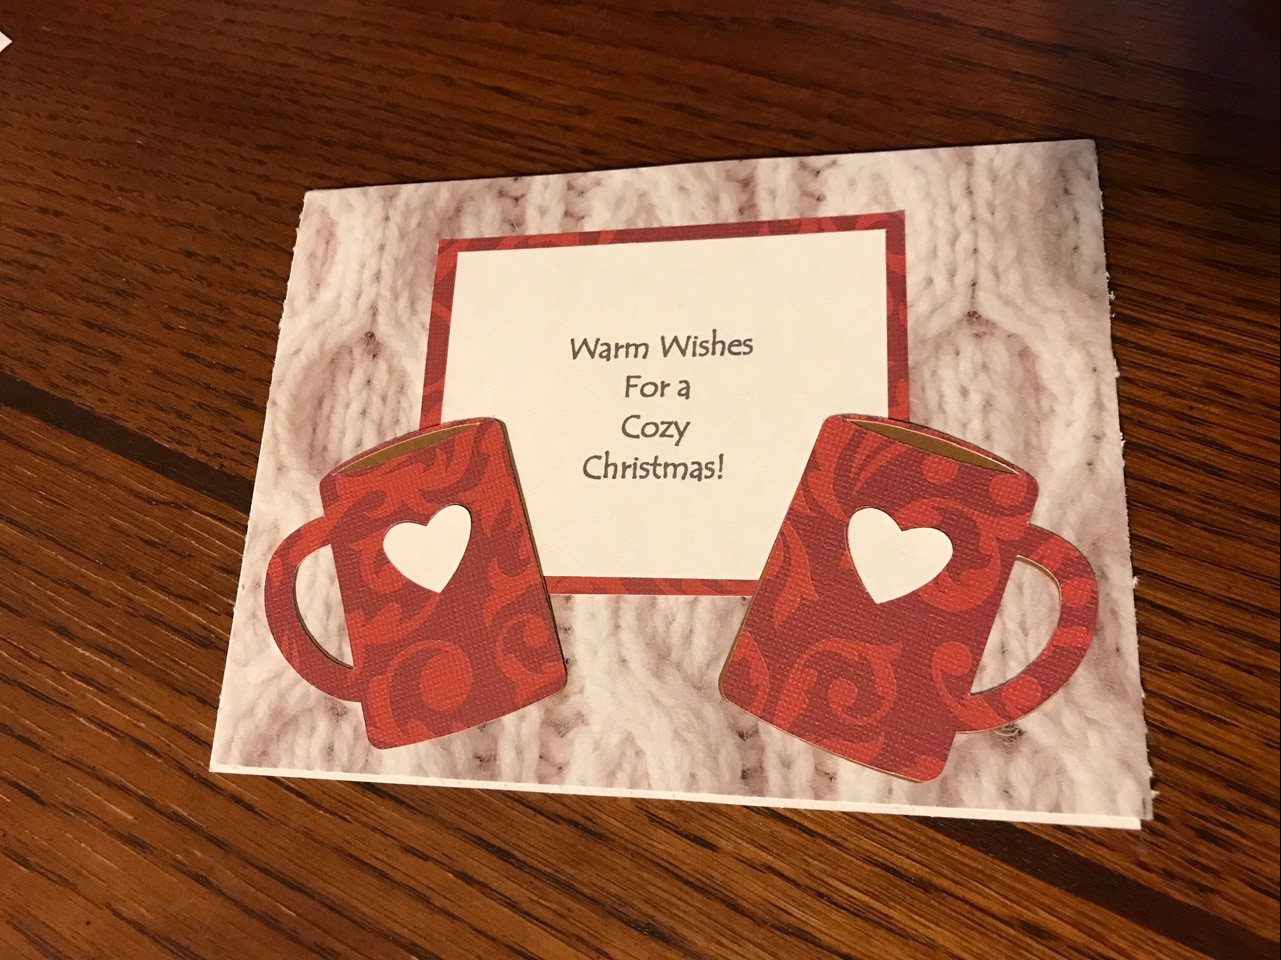
I think I did these mugs with the Cricut as well, but they would be simple enough to draw.
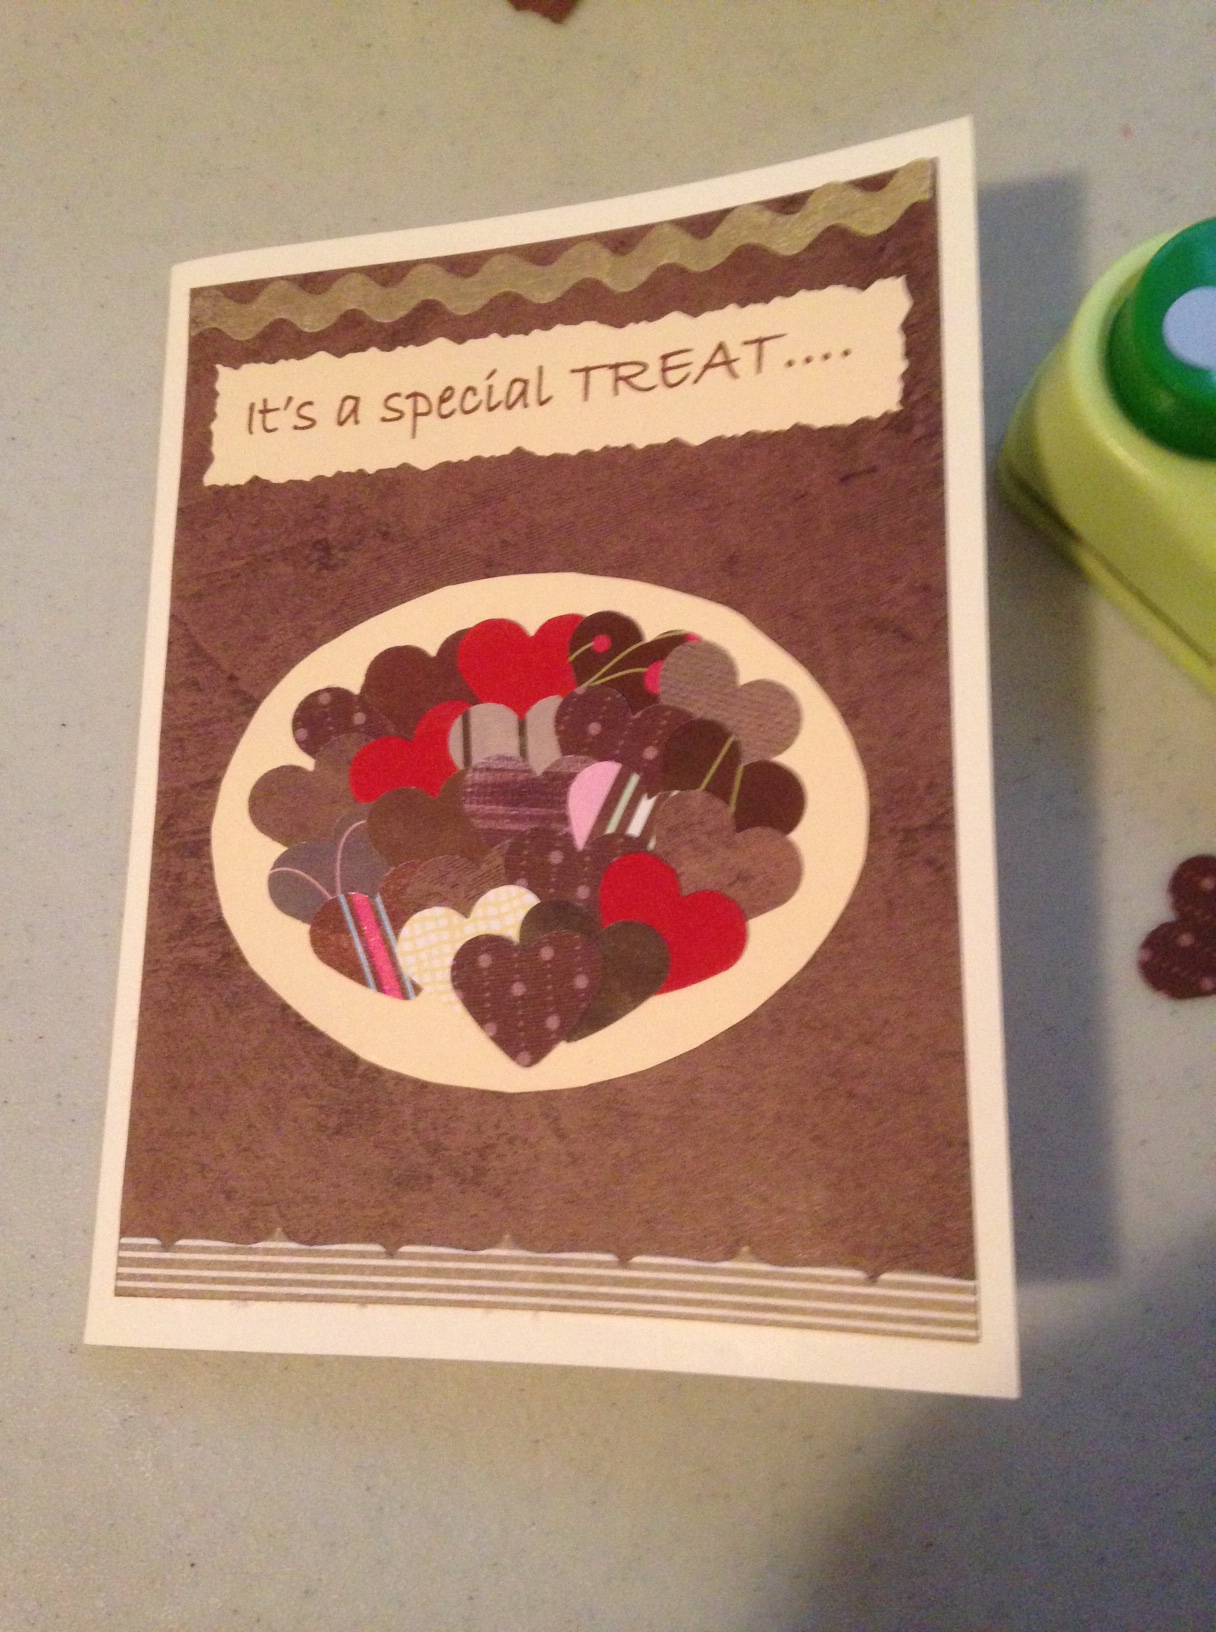
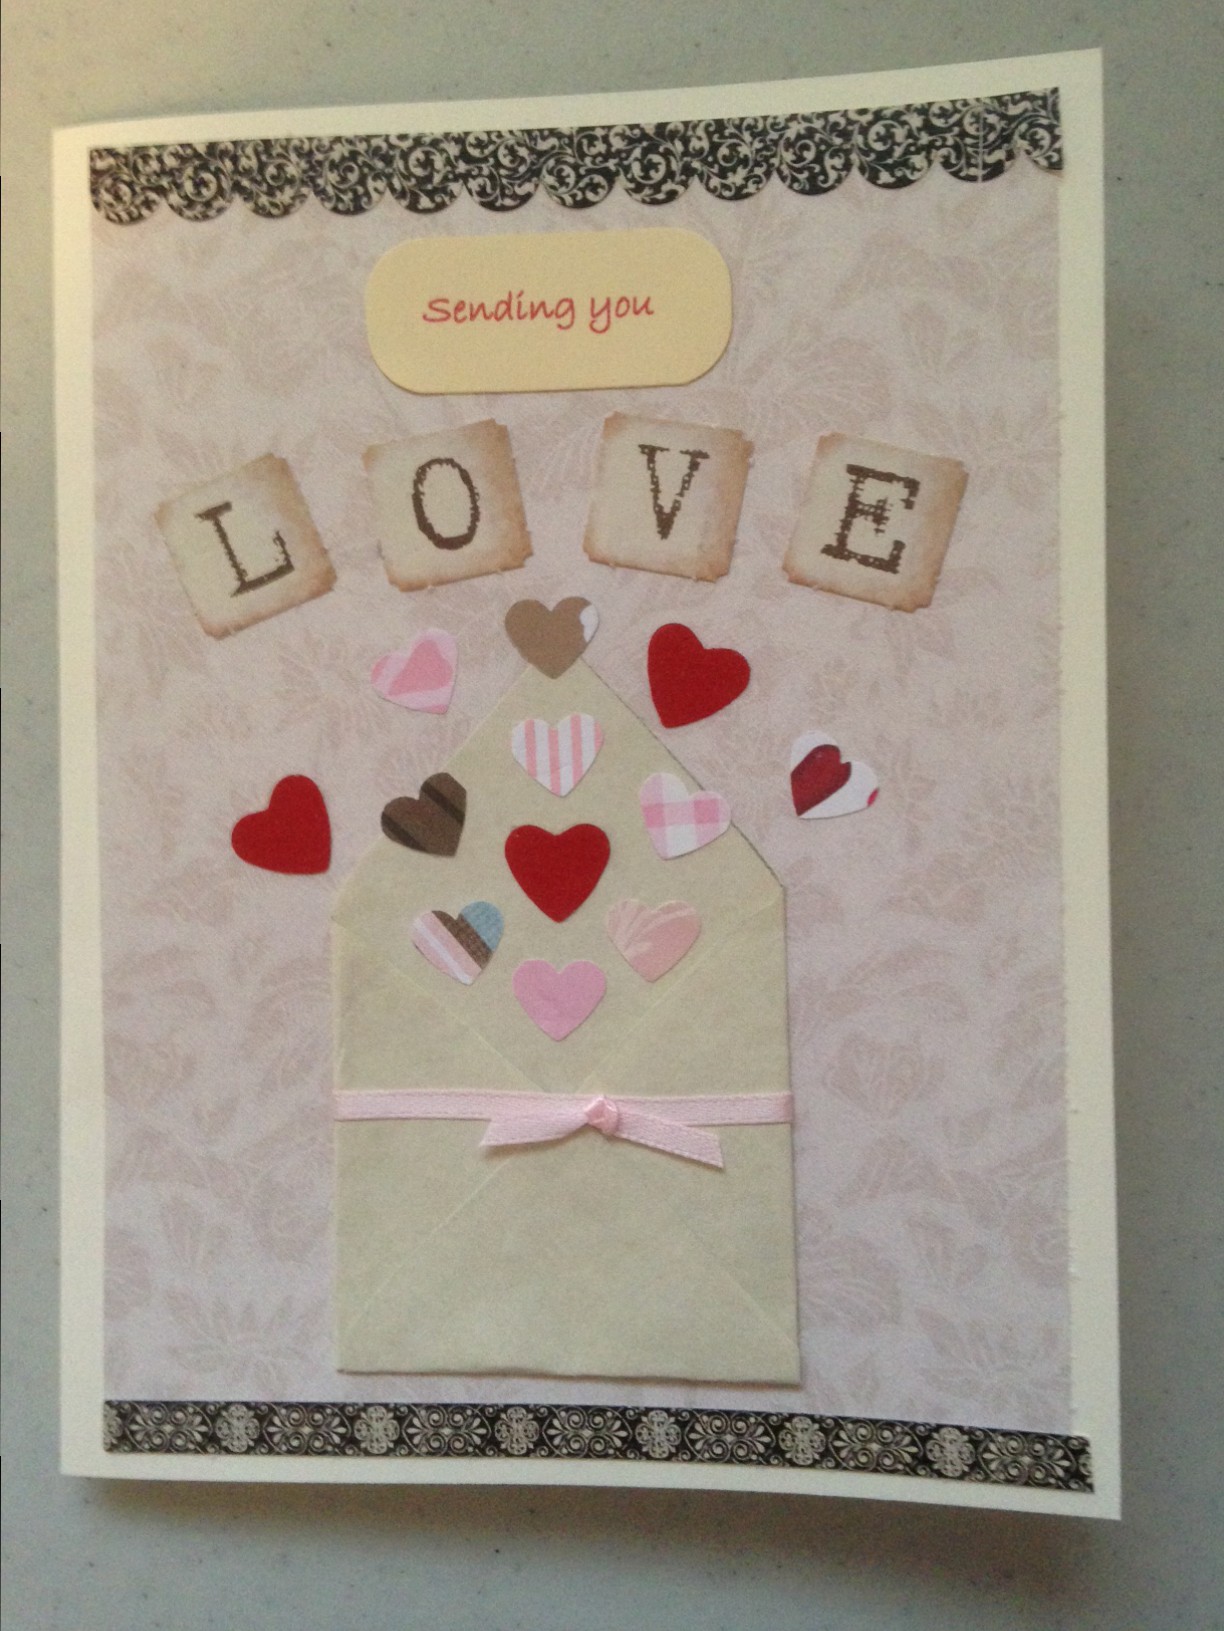
This is one of my favorites, from an idea on Pinterest.
I used a heart punch on various papers to make what I hoped looked like a plate of Valentine candy. Decorative sticker trim is at the top and bottom.
This was another made with heart punches. The letters for “LOVE” came from a package of scrapbooking paper which had a couple of pages of letters.
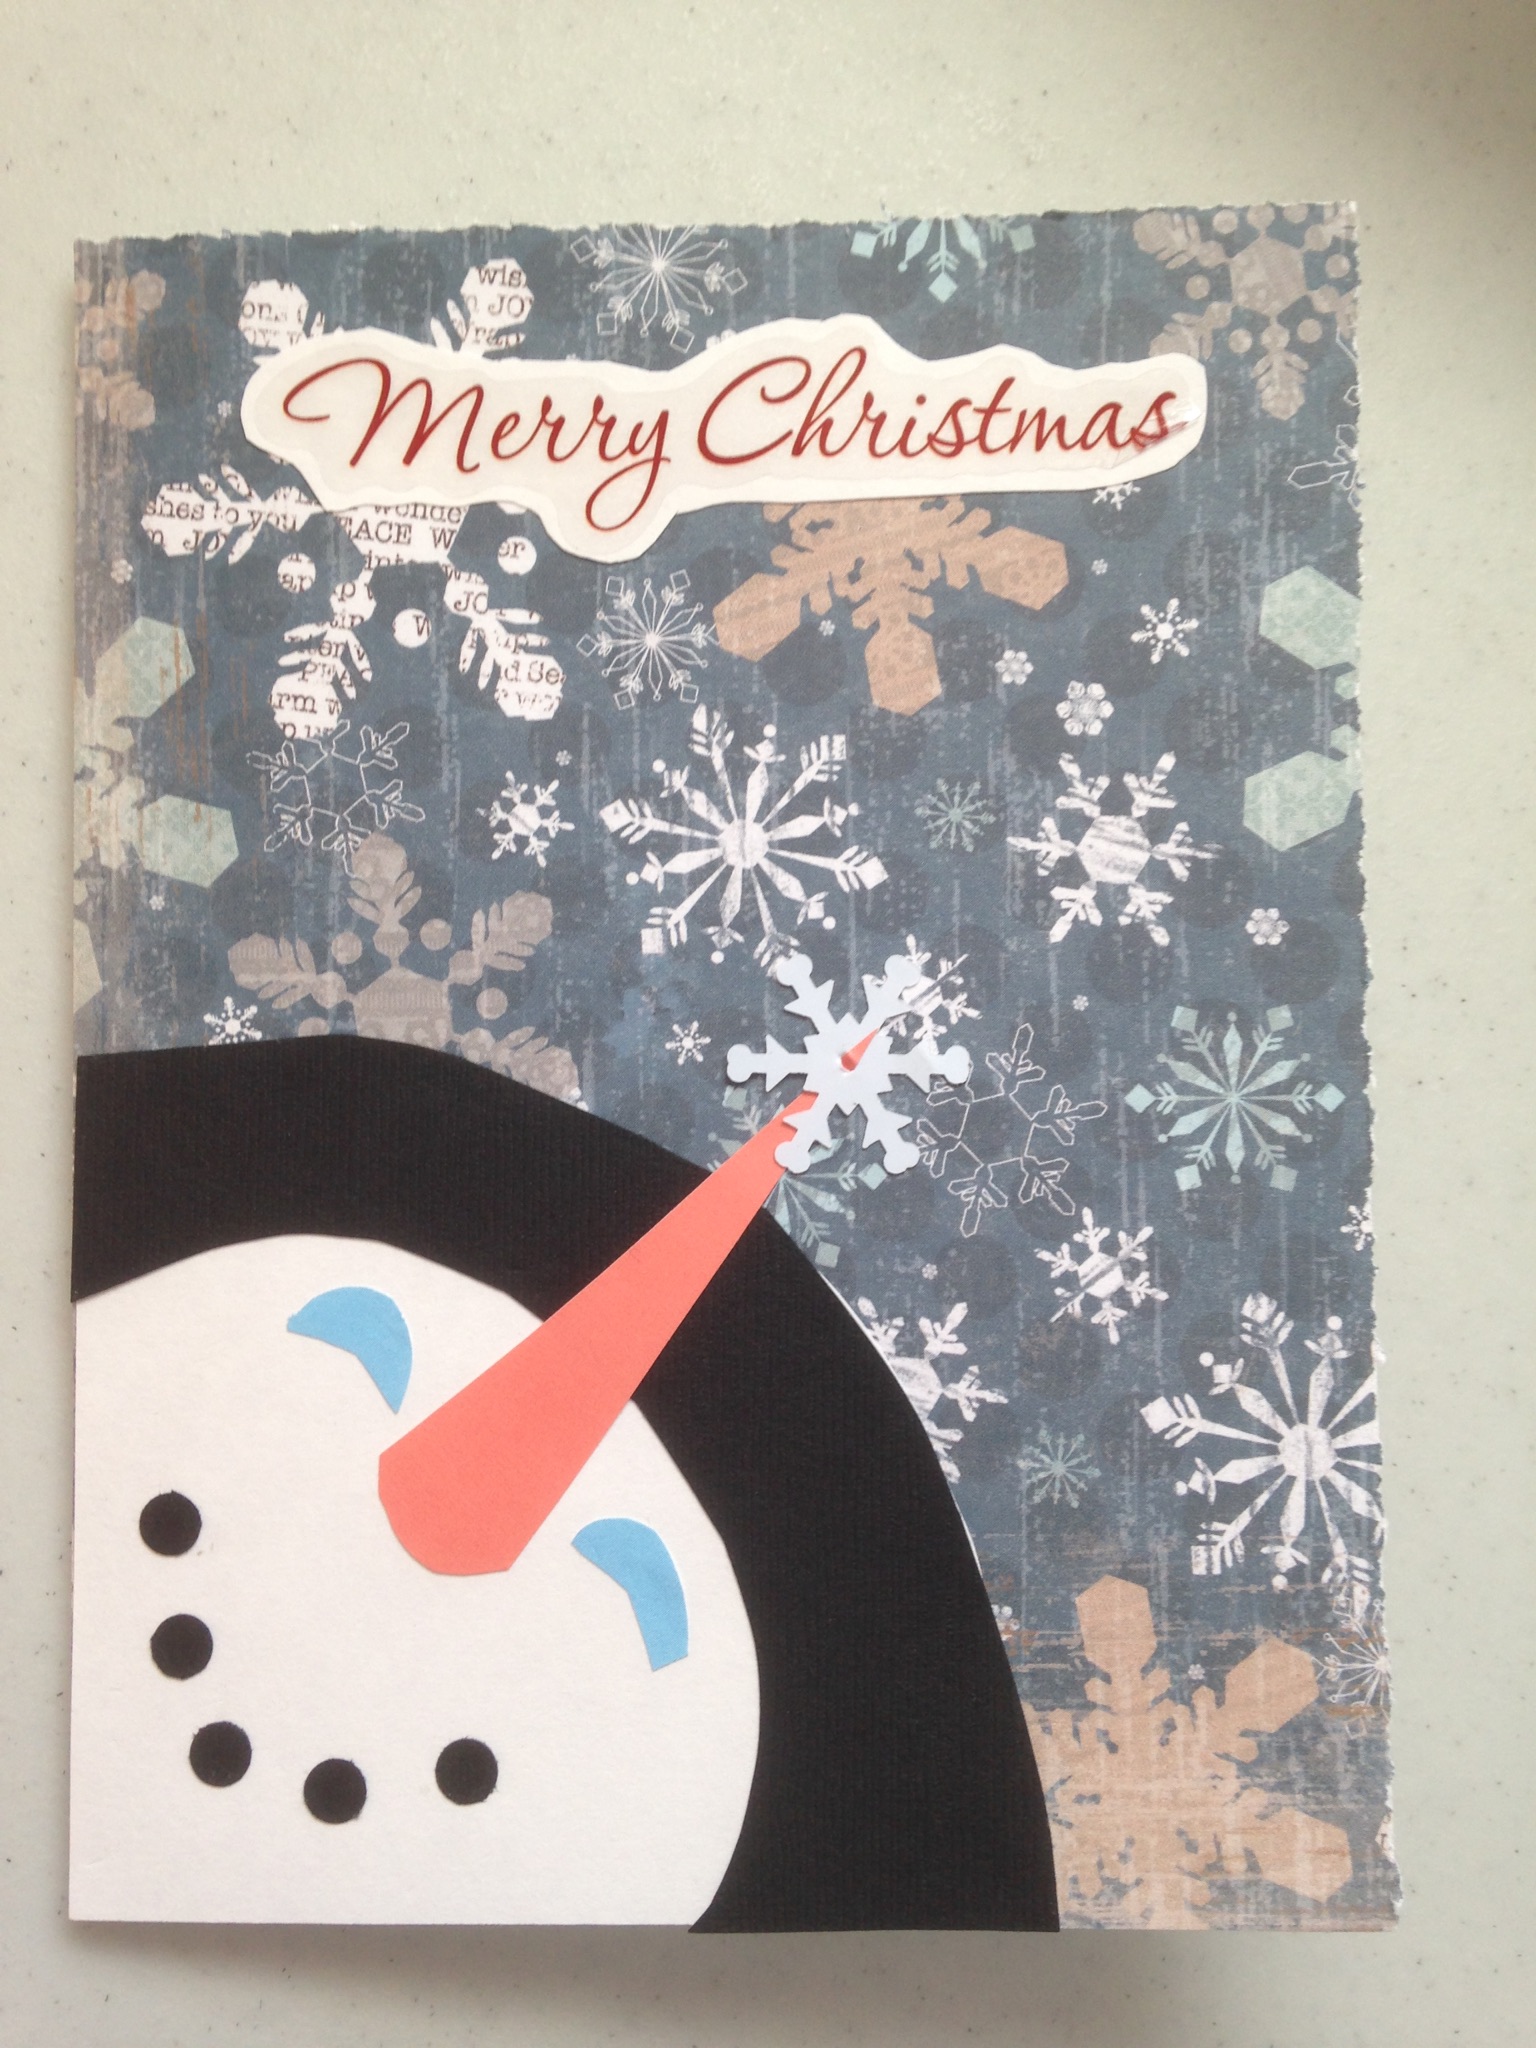
This is another Pinterest inspiration. I think I did it all freehand except the snowflake. And the dots for the mouth were probably from a punch. “Merry Christmas” was a sticker put on cardstock, then trimmed following the shape of the letters.
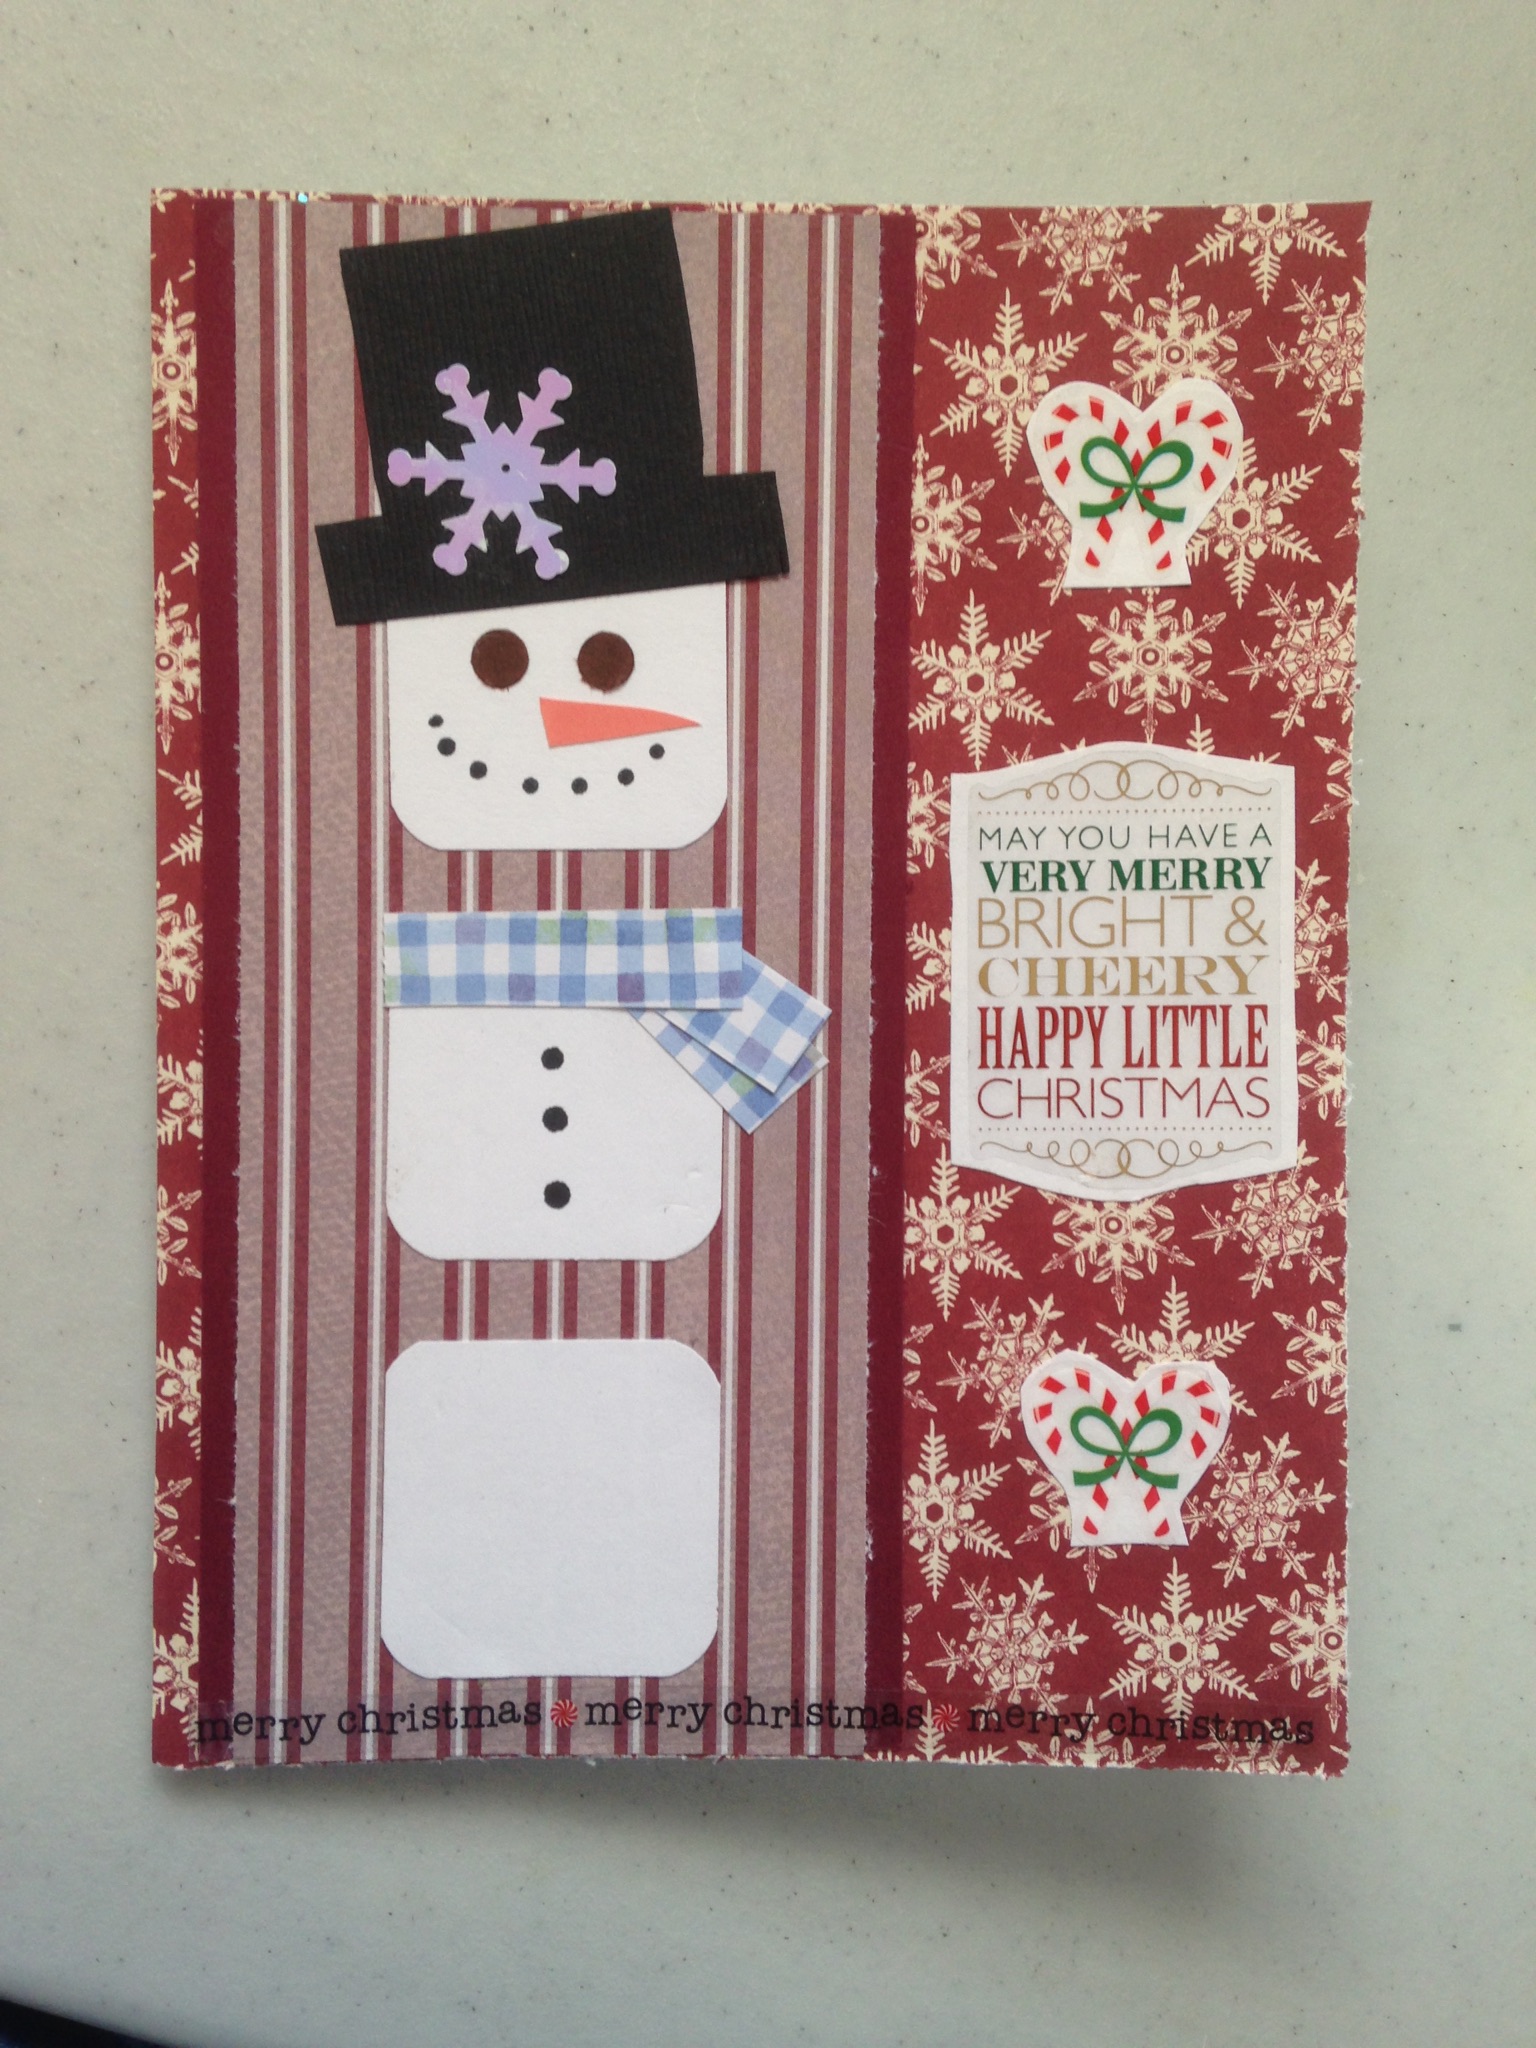
This one was made with two different kinds of paper for the background and stickers for the side graphics. The “scarf” was made from scrapbooking paper. The snowflake on the hat was from a package plastic snowflakes.
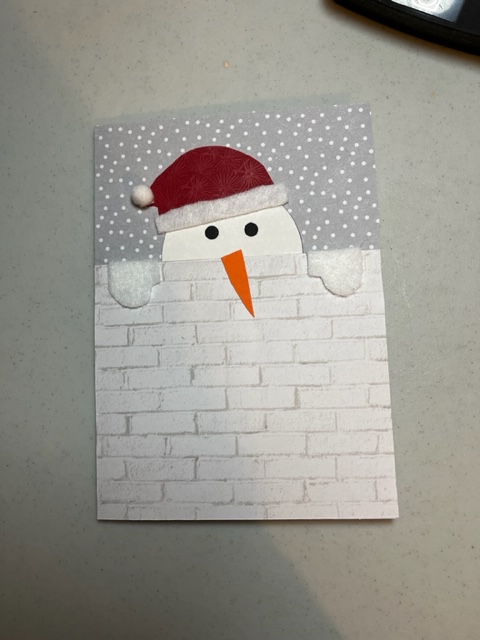
Another freehand idea from Pinterest.
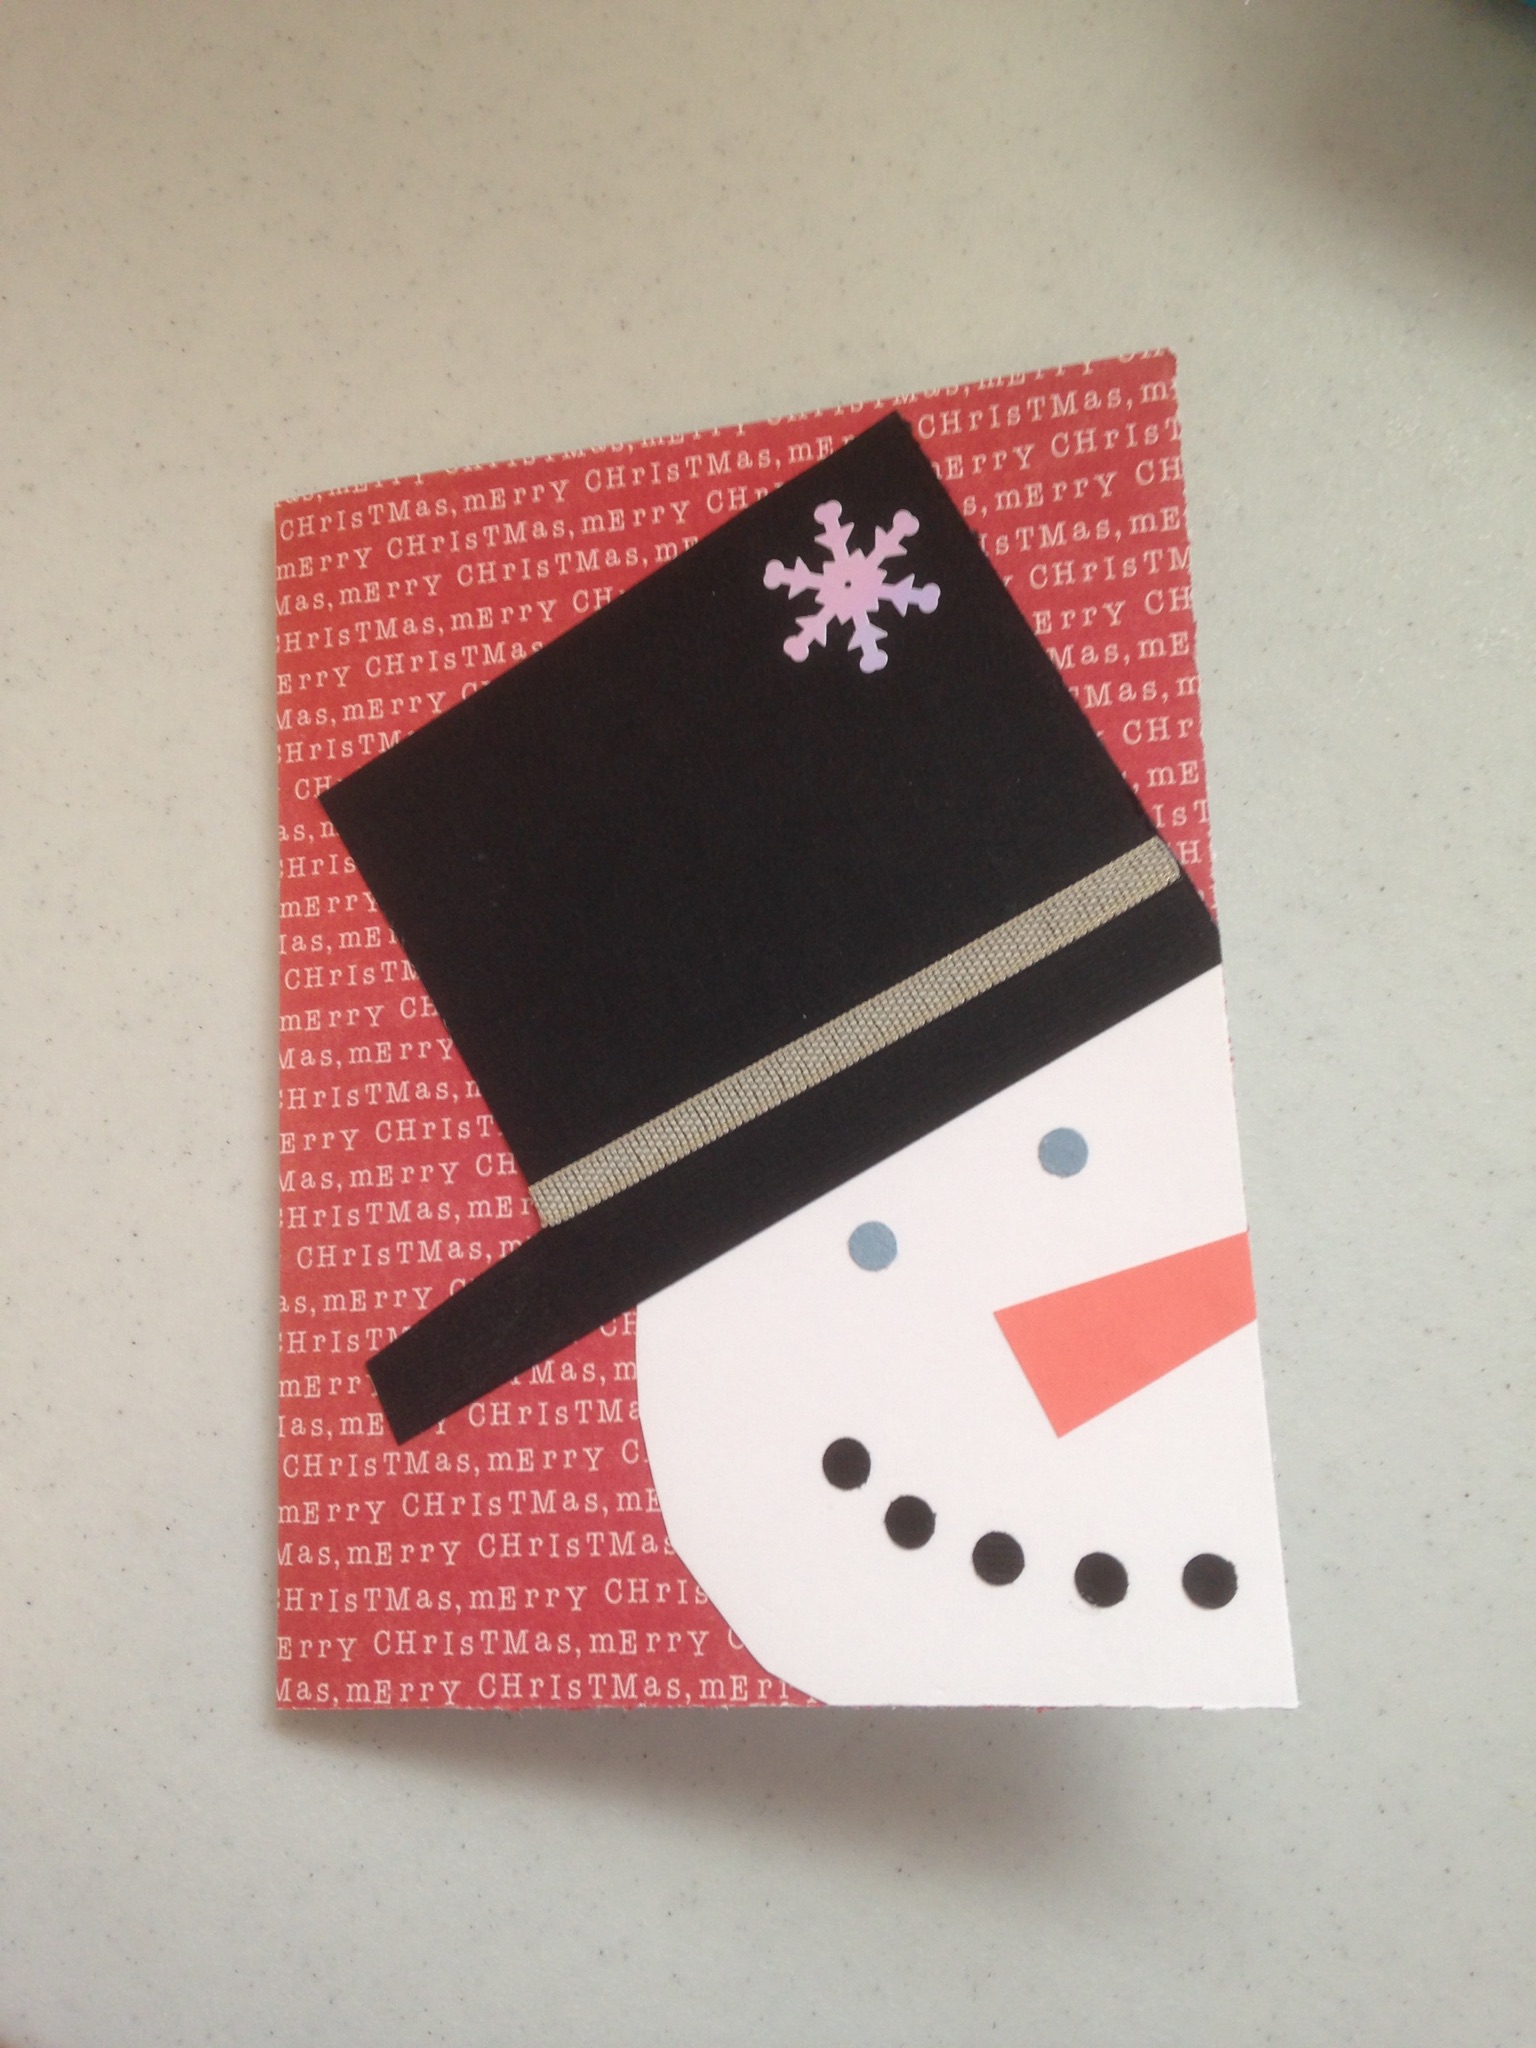
The “wall” and sky here were scrapbooking paper, and the snowman was freehand. The hat came from a package of felt stickers.
The white square here is from a corrugated scrapbooking paper:
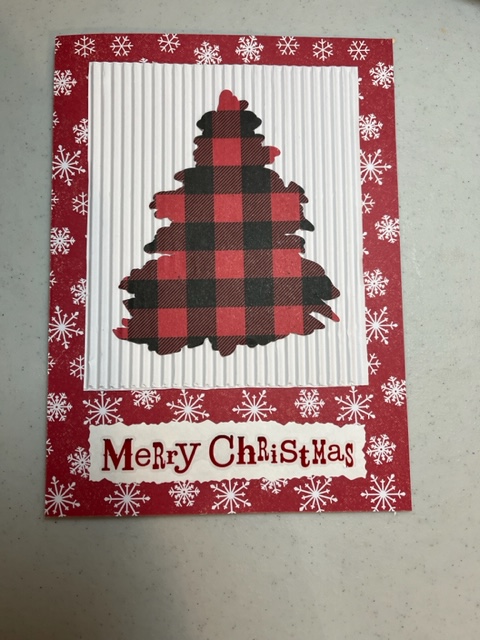
The tree was done with the Cricut, but could easily be cut out by hand. The “Merry Christmas” was another sticker placed on white cardstock and cut with decorative scissors.
This Pinterest idea also uses corrugated paper, two different scrapbooking papers, ribbons, and a button with twine:
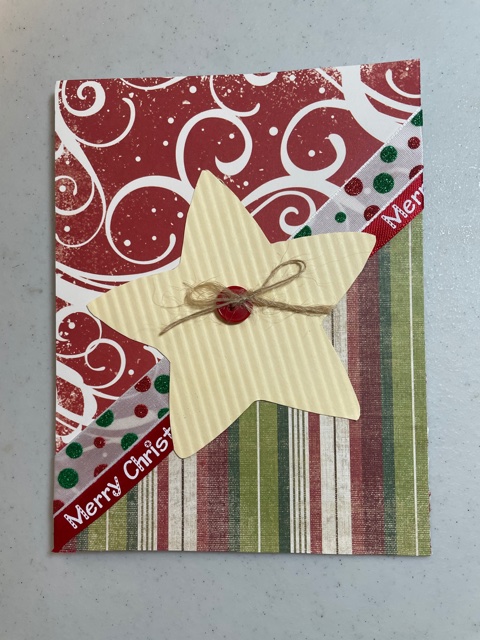
Tip: if you’re using lace, fabric, or ribbon that is not a sticker, it helps to dab the glue stick on the cut edges so they don’t fray.
The dress here was cut out freehand, and the “lace” is a sticker:

The flower came from a package of them.
Here is another one with simple shapes and a variety of papers:
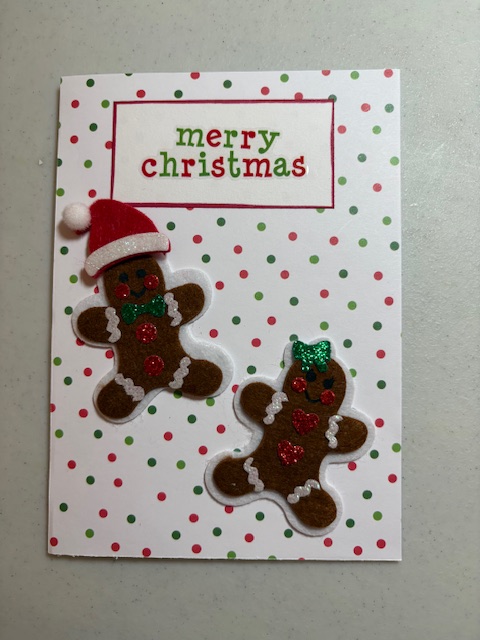
This card just used scrapbooking paper, a Merry Christmas sticker, and puffy gingerbread people stickers. I added a felt Santa Christmas hat sticker.
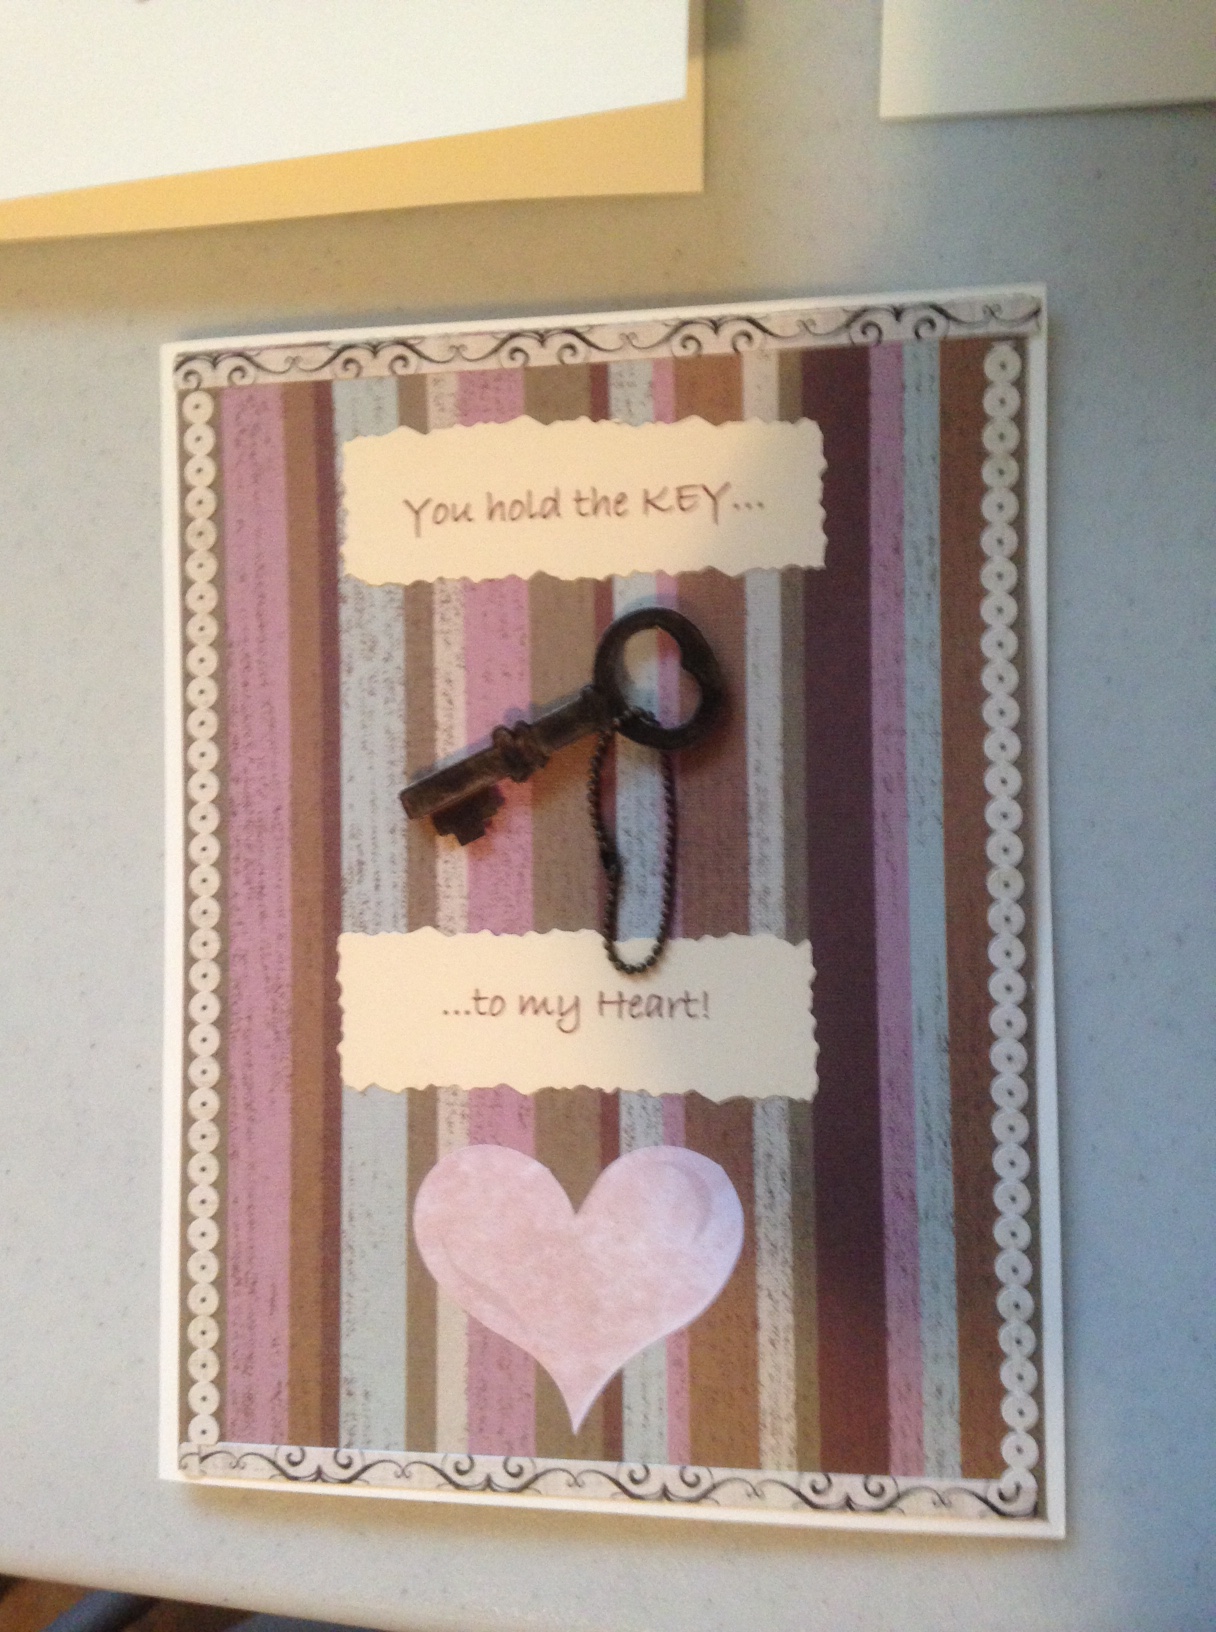
You can find all kinds of little shapes at craft stores to use on cards. This little key was glued on scrapbooking paper, then I put decorative sticker trims around the edges.
There are even more tools, materials, and ideas for card-making out there. Cards can be very simple or elaborate, depending on your tastes and time.
I hope this inspires you to try making cards yourself.
(I often link up with some of these bloggers.)

Thanks so much for this! You are so creative, and you certainly do have a good number of supplies. My thought is to find a friend who has all the gadgets and then bring over a chicken for lunch. Saves me lots of money! LOL
You’re welcome any time, and you don’t even have to bring a chicken. 😀 I was hoping to convey that a great many cards could be made with very few gadgets.
You definitely showed that card making can be as simply or elaborate as you wish. A good post!
You are very talented! I don’t have a creative bone in my body! LOL! Thank you for sharing.
What a fun post, and I appreciate all the ideas. You getting lots of crafting things as gifts make sense, and I too prefer to buy my own clothes, etc. No guilt needed! I too have a cricut, although I don’t think mine connects to the computer. It’s an older model and although my one daughter did use it recently to make a sign for her wedding, I haven’t used it much since the kids stopped needing it for school projects, 4-H, etc. I should make more use of it. I too have many supplies, in my case mainly from the days when I scrapbooked. I think I have enough paper, stickers, etc, for about 3 lifetimes. SO I need to get going and make some cards with that! Thank you for the inspiration today, and also for the encouragement that cards don’t have to be super fancy. When I go to the card class I do about once a month, the woman who does them has us embossing, die-cutting, etc. I enjoy it, but I never want to start sinking more money into all that. I could do a lot just with what I have. I too love the card that looks like a guy’s shirt complete with note in the pocket!
I have an older Cricut that uses cartridges, too. I was planning to sell it, but then thought–what if the Cricut company ever goes under? Then I’d lose access to the Design Space. So I kept the old one just in case.
I used the old one for ladies’ ministry projects, too–it was so nice to have it cut multiple shapes for a ladies’ luncheon. I think I also used it for one of my son’s display boards for science fair.
Come to think of it, my interest in cards began with a lady in our former church in SC. She spoke to the ladies a couple of times, demonstrating card ideas. Hers were a lot more detailed than mine.
Beautiful cards!
Thank you!
I too enjoy making cards. I mostly utilize rubber stamps, and use other embellishments only a bit. I know rubber stamps are no longer popular. One great thing, is for a few years now, I often find wood rubber stamps at thrift shops for cheap (50 cents or $1) and I have so enjoyed having a great variety of stamps without spending much money. And the embellishments I use are often recycled (repurposed) paper items from various sources. Your cards are beautiful! I am not creative, and also need to see cards to get ideas. I am simple so I take an idea and simplify it. I want a card to come together fairly quickly without too many steps!
I have a lot of stamps, but I don’t get them out as often. I use the one about thinking of your, prayerfully, most often as well as one for the back of the card that says, “Handmade for you by . . .”
That’s great to know stamps can be found at thrift shops! I wonder if that’s true of a lot of crafting materials. It seems like some shops just carry basic items any more. I wondered if that was because fewer people are crafting, or they’re getting their supplies online.
So many good ideas
So this is how the magic happens! There really are so many tools and elements available and the Cricut certainly expands possibilities. It kind of makes my eyes glaze over when I walk by the crafting aisles — overwhelming unless you’re hunting for something specific.
What a lovely and fun post, Barbara! You have such creative ideas and the cards you’ve shared are so beautiful!
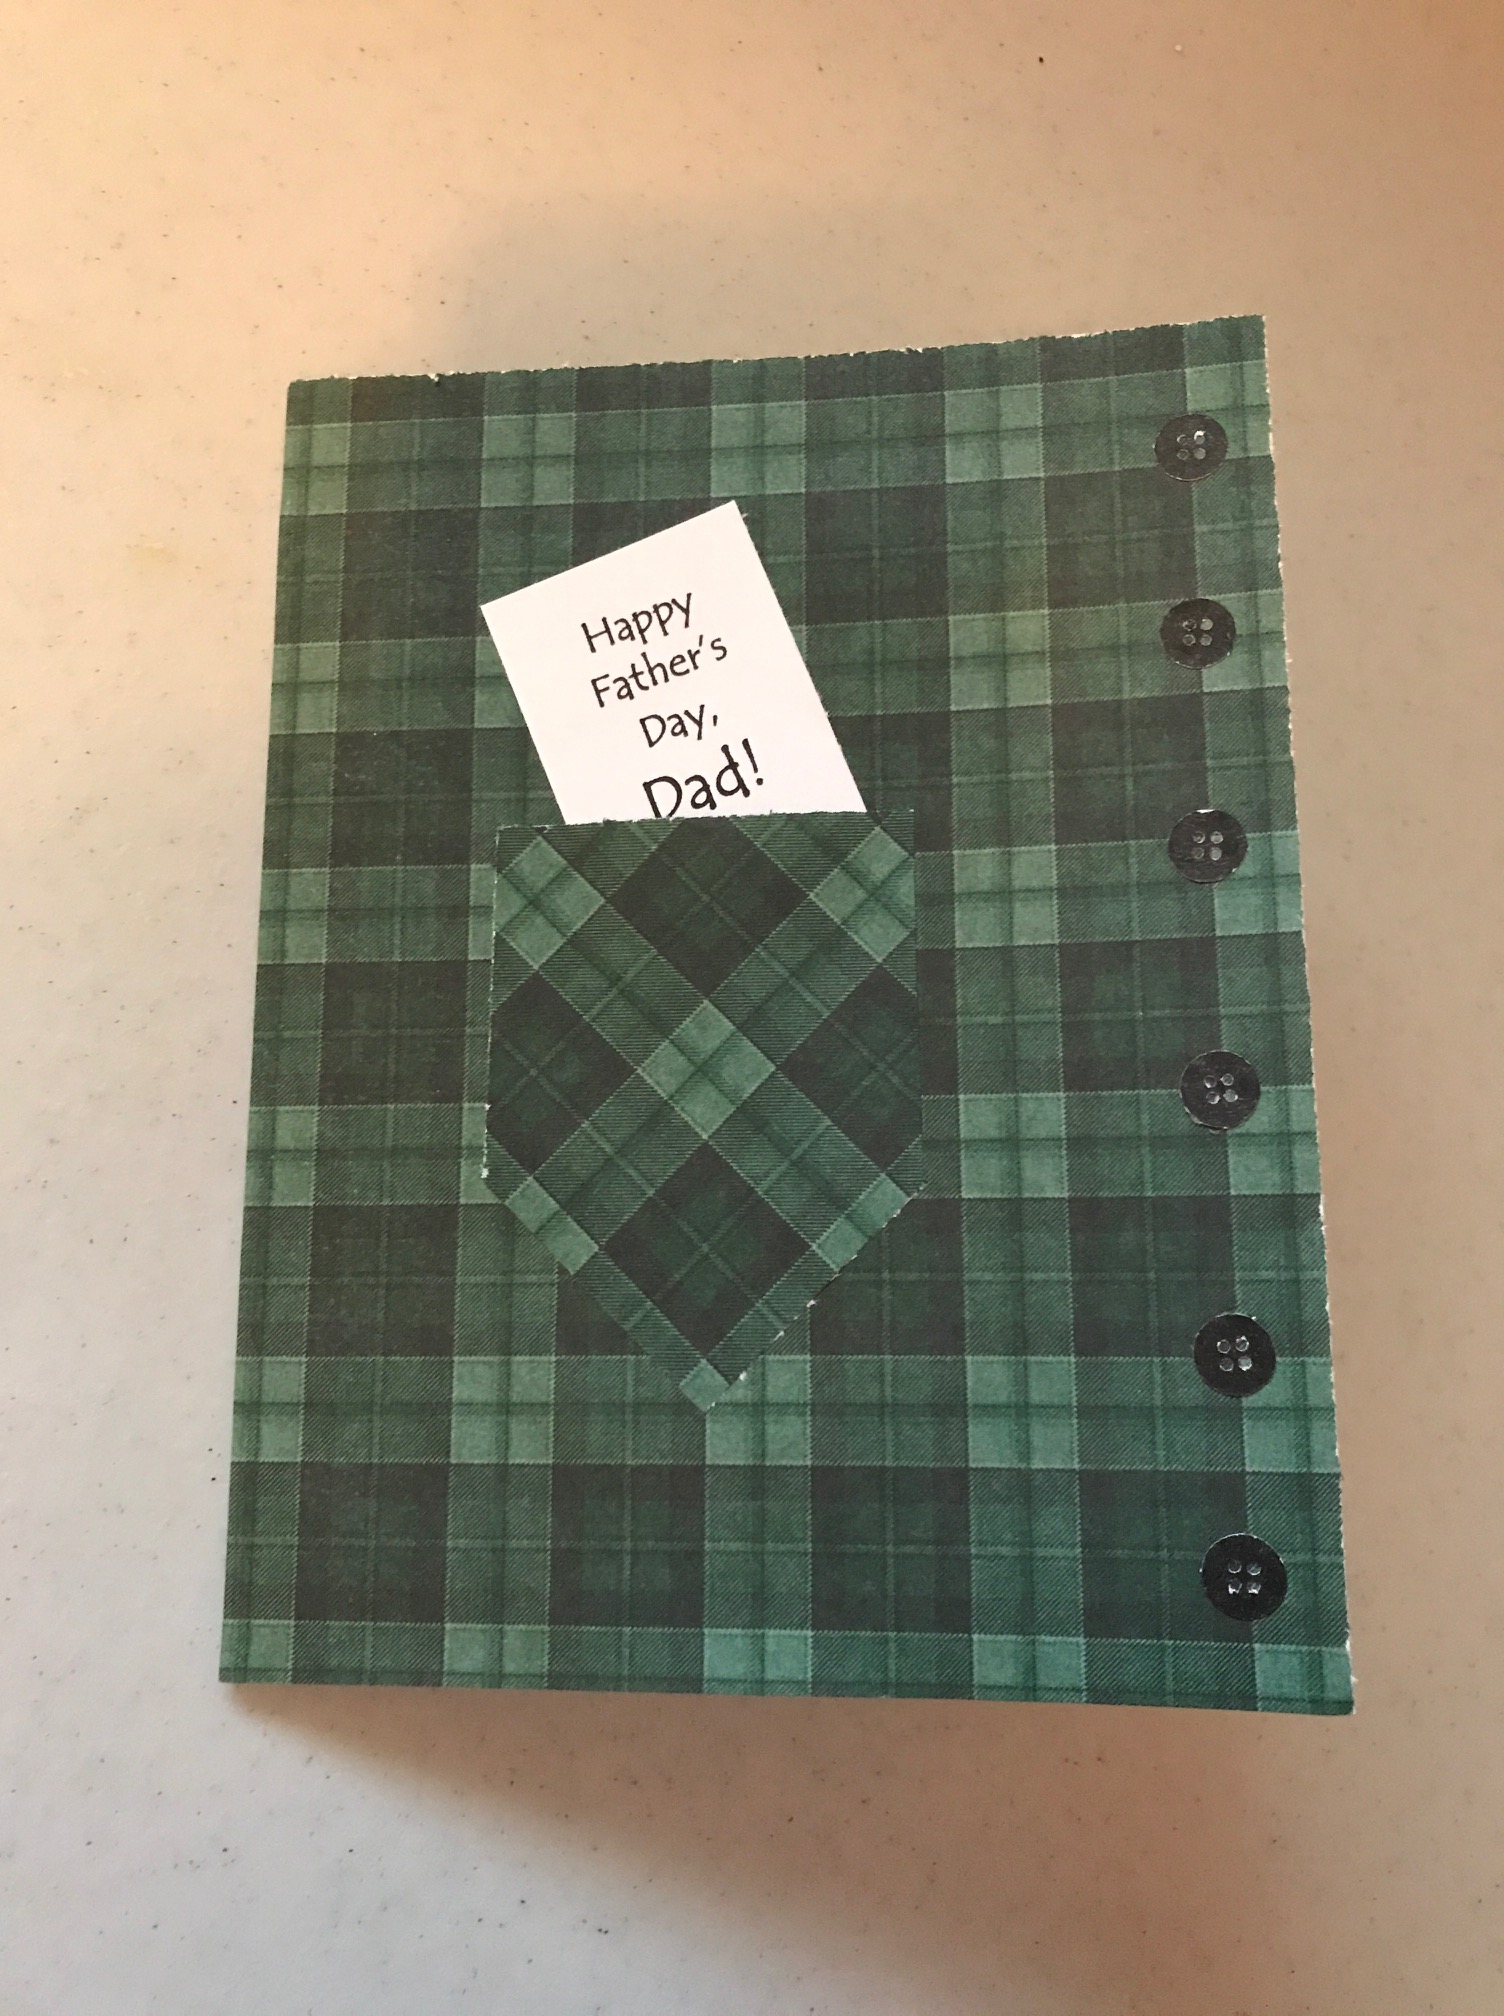
Barbara, thank you for sharing all your creativity with us! That green plaid shirt Father’s Day card and the Sending Love card jumped right out and caught my heart.
May the creating, writing, and sending little caring notes through the mail be somehow revived! Absolutely lovely, friend.
I have a HUGE Pinterest board of card making/scrapbooking/paper crafting ideas. My husband and I often joke about how much I “save” by making my own cards because I definitely buy lots of supplies too that totally negate the savings of making them myself.
Pingback: June Reflections | Stray Thoughts
Barbara, these are so beautiful! I have a similar story–I started making cards when I couldn’t find one with the right message for the recipient and spent an hour trying! I decided I could make a card in less time. 🙂 Visiting from the Sweet Tea & Friends linkup.
Thank you! I’ve run into that, too–I often like the front of a card, but not the insides, or vice versa.
Thank you for sharing and participating at SSPS 367. See you at #368I love a handmade card, it’s personal and special. I hand embroider cards and use that in stead of buying cards.
I can’t imagine the time involved in embroidering cards. They must be beautiful and so personal.
Yes, as any handmade product, it does take time but so satisfying.
Me again, Congratulations, your post will be featured this Monday at SSPS 368 Thanks for sharing.
Thanks so much, Esme!