
For some months now I’ve been searching for some way to keep my laminator and Cricut close by and ready to use, but off my work table so I have more space there. The room is small, so I didn’t have much wall space or closet space to put another storage unit (and I didn’t want to keep them in the closet anyway.) I wanted something on wheels, and because the laminator gets so hot, I wanted to avoid plastic storage.
I’ve been looking at various storage units and ideas and not seeing anything that would really work, and then one day this caught my eye in W-Mart:
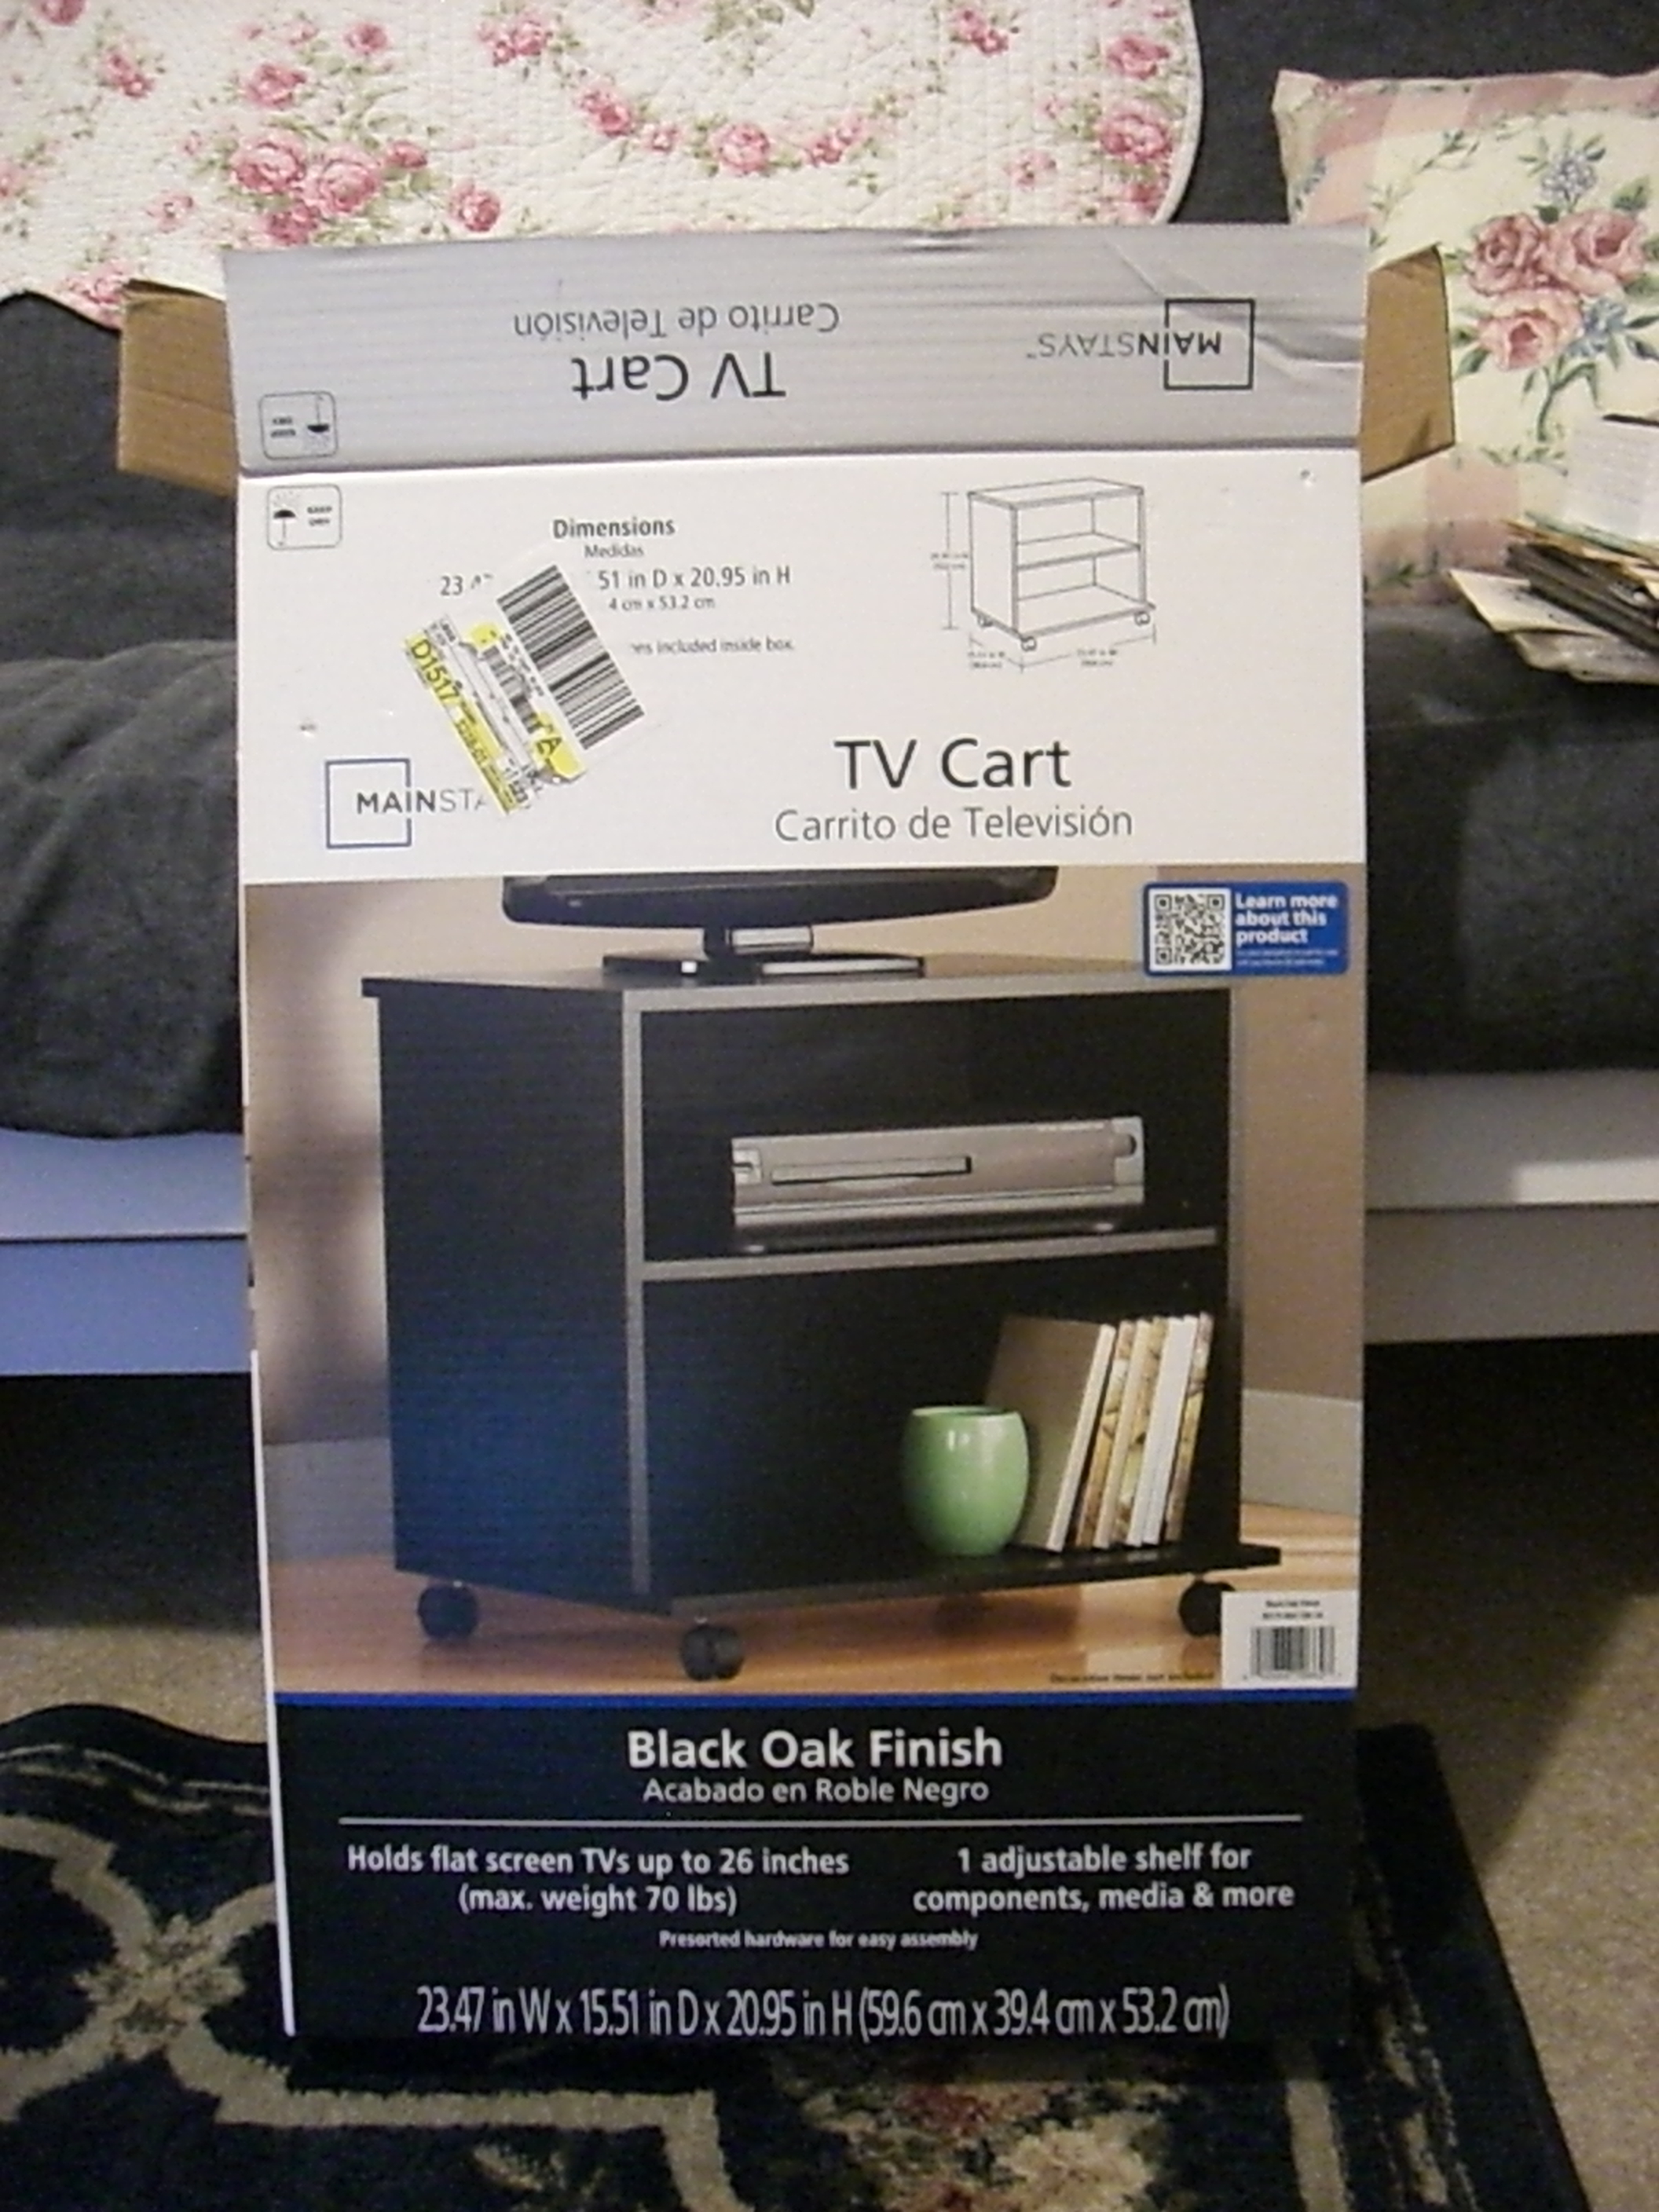
I had taken measurements of my work table and saw that this would fit underneath it! And it was the right width and already on wheels — perfect!
Except it was black. I appreciate black furniture in other people’s houses, but it’s just not my preference, and it just wouldn’t “go” in this room.

So, inspired by DIY projects I’ve seen on Pinterest and elsewhere online, I decided to spray paint it white. I knew it would take several coats, but otherwise it should be simple: just point and shoot, right?
Wrong.
I did know to paint the pieces before putting them together. At first I was holding the can too far away, so most of the paint went into the air rather than on the cabinet. (I was thinking, “Wow, there is more aerosol than paint in this thing! Then I realized the problem.) But when I got close enough for the paint to stick, then I had problems with drips, sputters, puddles, and uneven coverage. When I tried to dab off some of the drips, it took a whole chunk of paint out, down to the wood. I was SO frustrated. My husband came home at that point and took pity on me and helped me. I had been holding the button on the paint can down continuously while spraying back and forth, but he took short quick individual strokes back and forth. He sanded off some of the problems areas, and multiple coats of paint evened out everything else. I also learned the cheap 96 cent spray paint is not the best. Krylon worked the best for us.
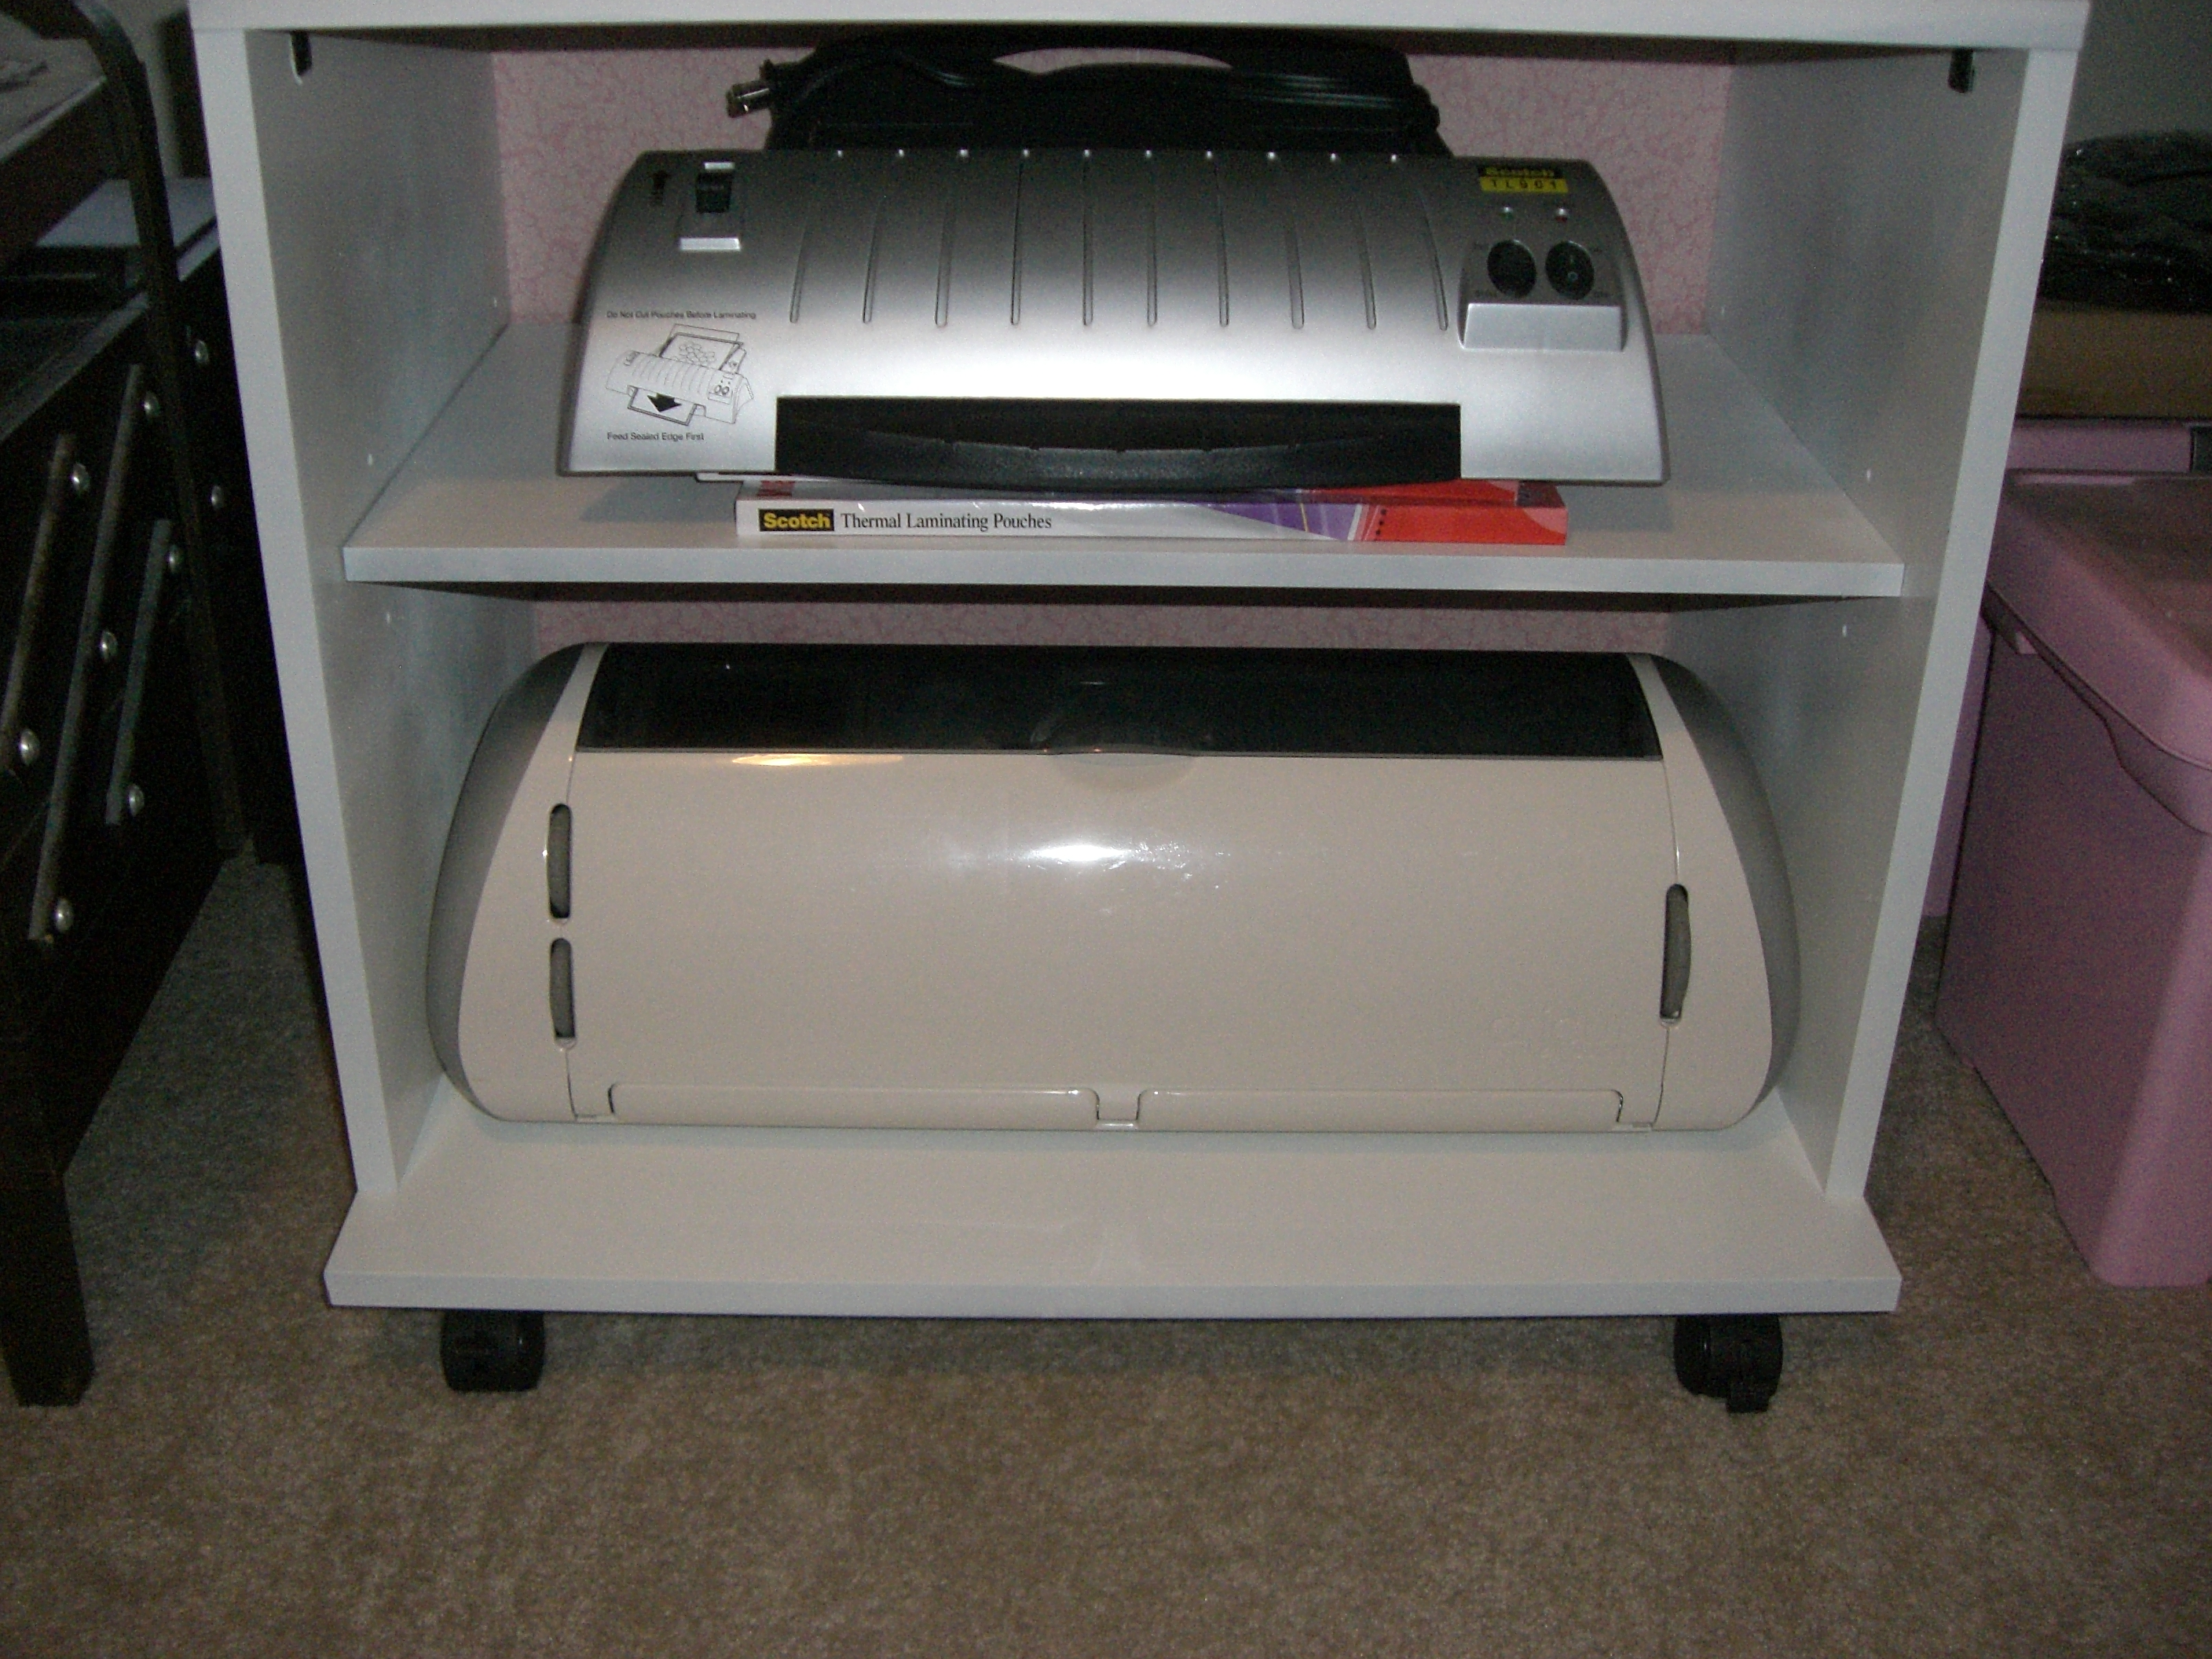
We let the pieces cure for about a week, and then Jim assembled the cabinet for me last weekend. I had also wanted to put some decorative scrapbook paper on the back wall of the cabinet, to look something like this or this or this or this. But I just used two-sided tape because I wasn’t sure if I’d leave it and wanted it to be easy to get off or change.
So, here is the finished product:
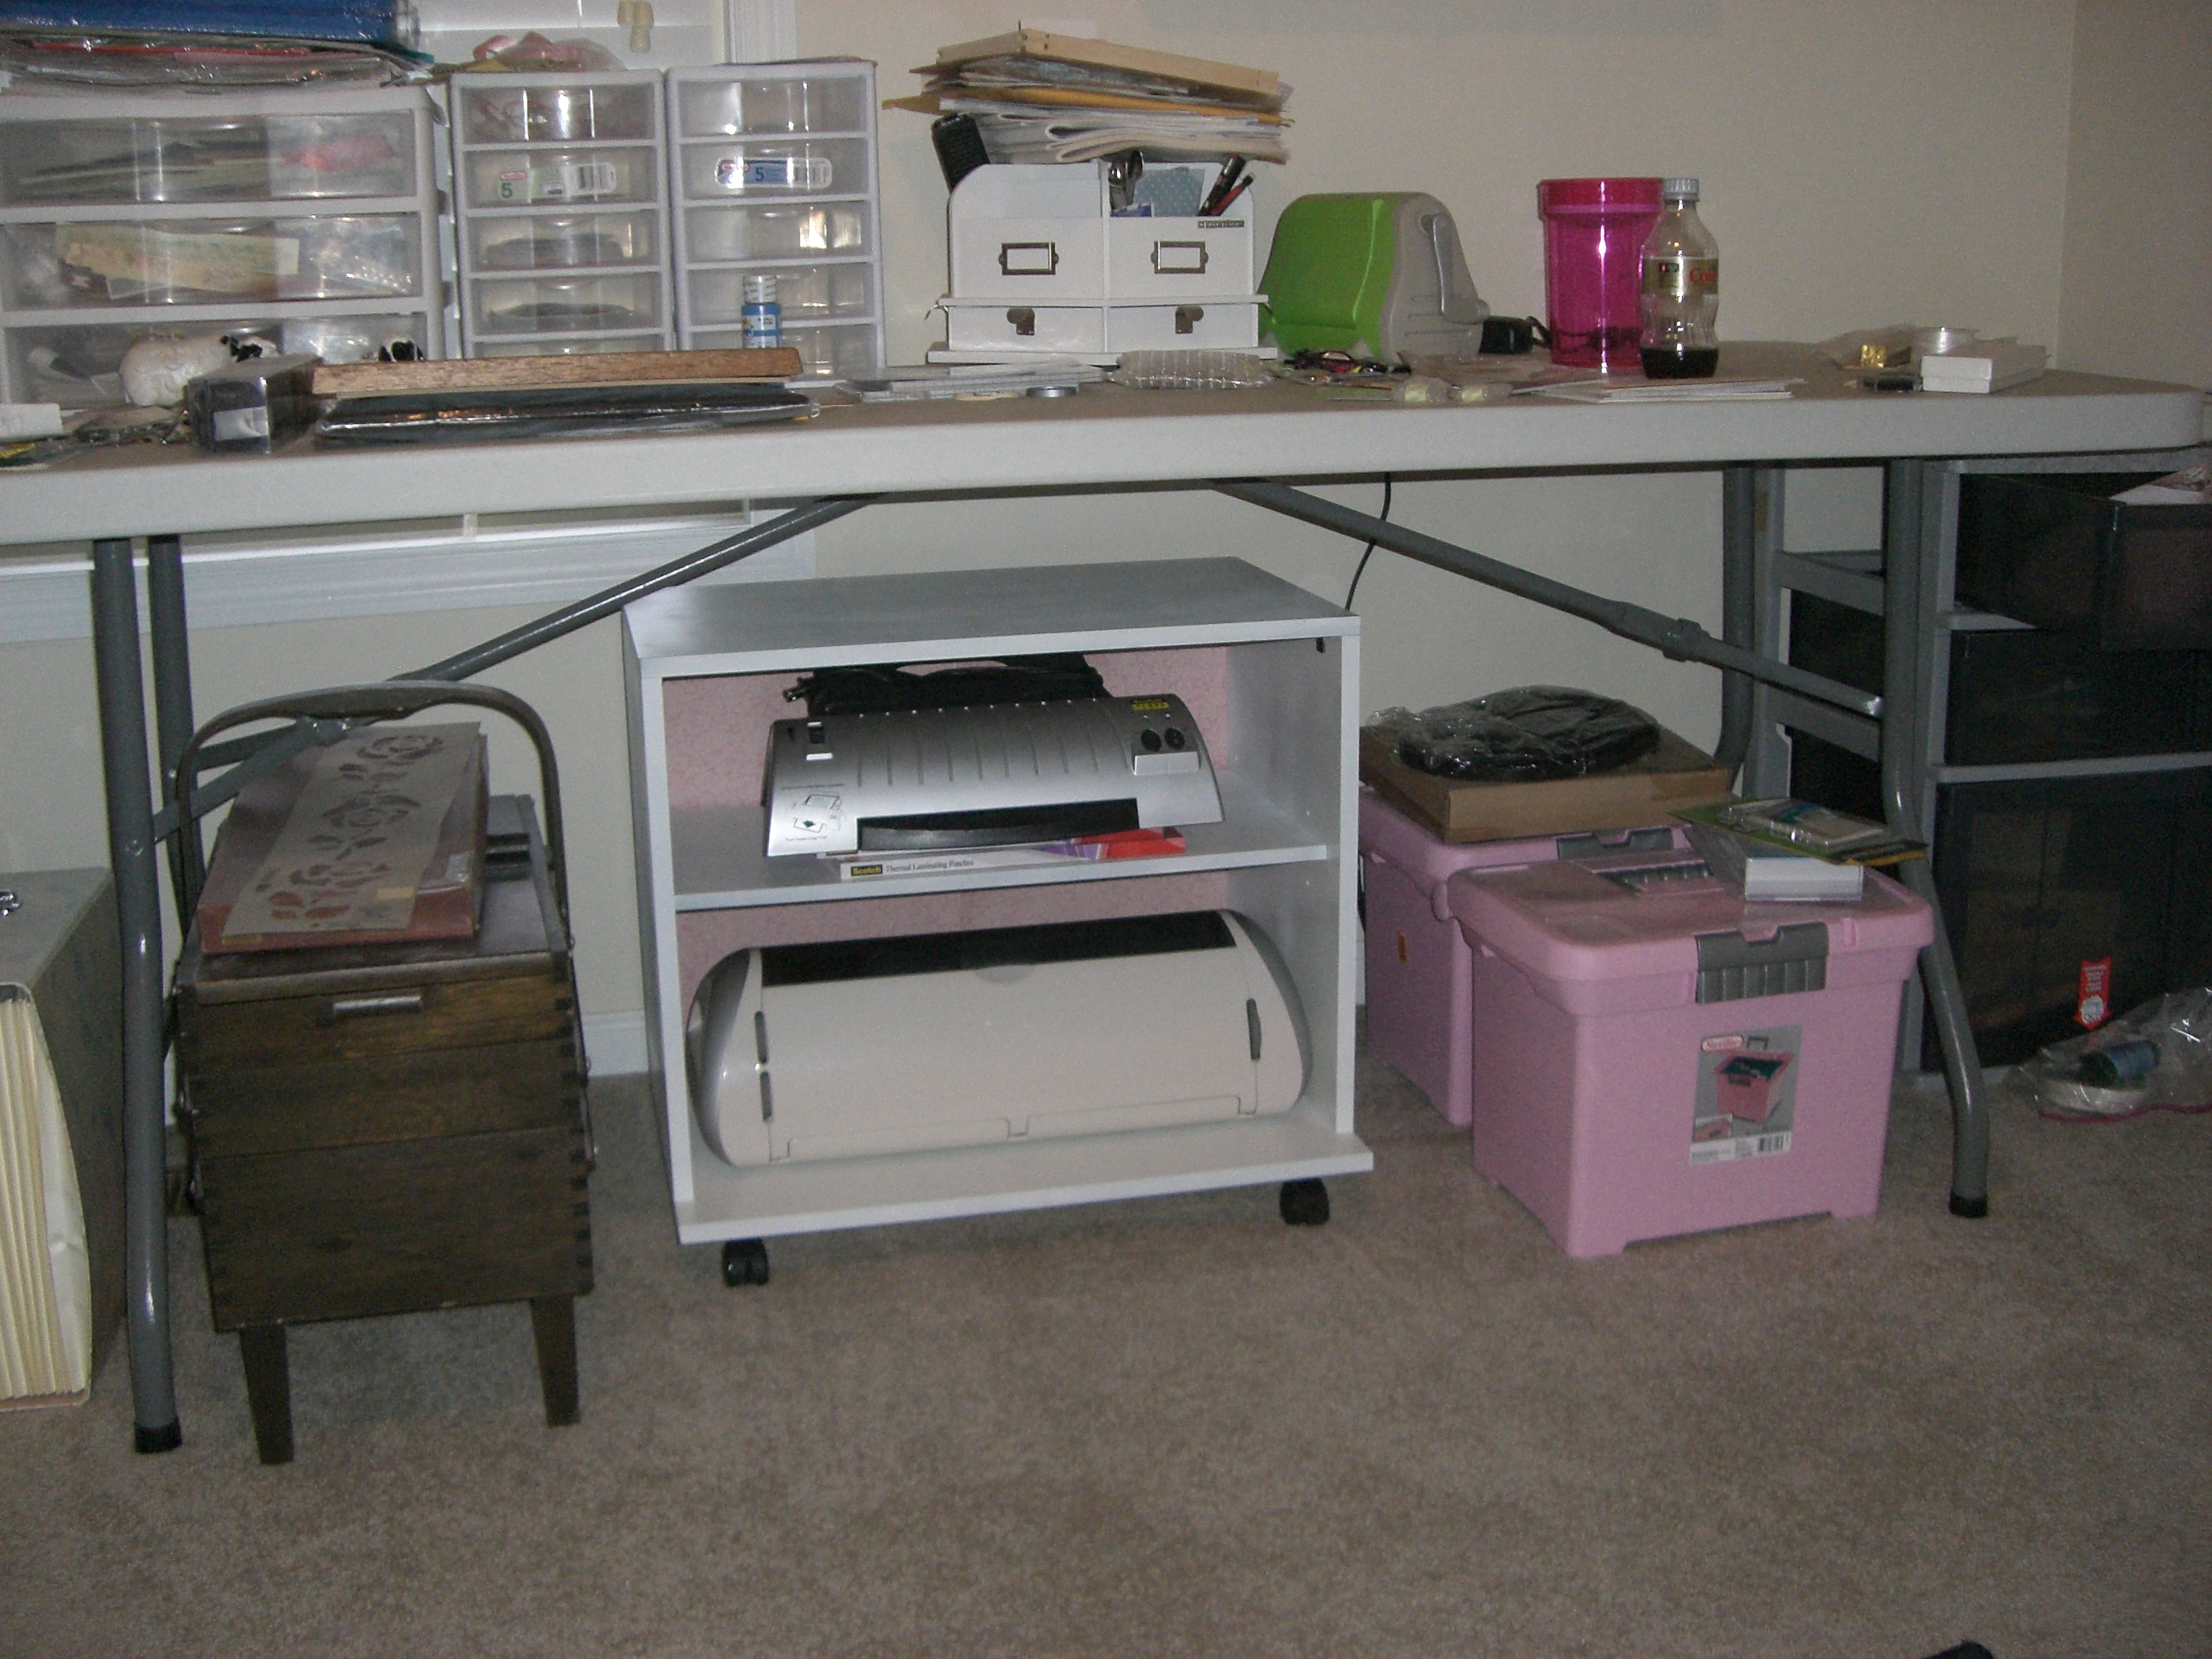
(Kindly ignore the other junk stuff on and around the work table – I’m still working on the rest of the room. 🙂 )
I love it. I like that it’s near at hand and I can roll it out when desired and put whichever machine I’m using on top, but I can keep it all tucked here out of the way otherwise.
I may decide I want to keep the Cricut out on the table after all, but if I do, I have plenty of other things I could store here.
The pink floral paper at the back really doesn’t show up except when I use the flash on the camera: otherwise it just looks dark back there. So in a sense that was kind of a waste, but mentally I’m glad to know it’s there.
I’m just tickled that this worked so well. This room is really starting to come together and be more functional.
I’m linking this project up with:
 And
And
This post will be also linked to Women Living Well.


")


