Cards and Crafts

I thought I’d share with you some of the recent cards I made as well as a hot-off-the press craft.

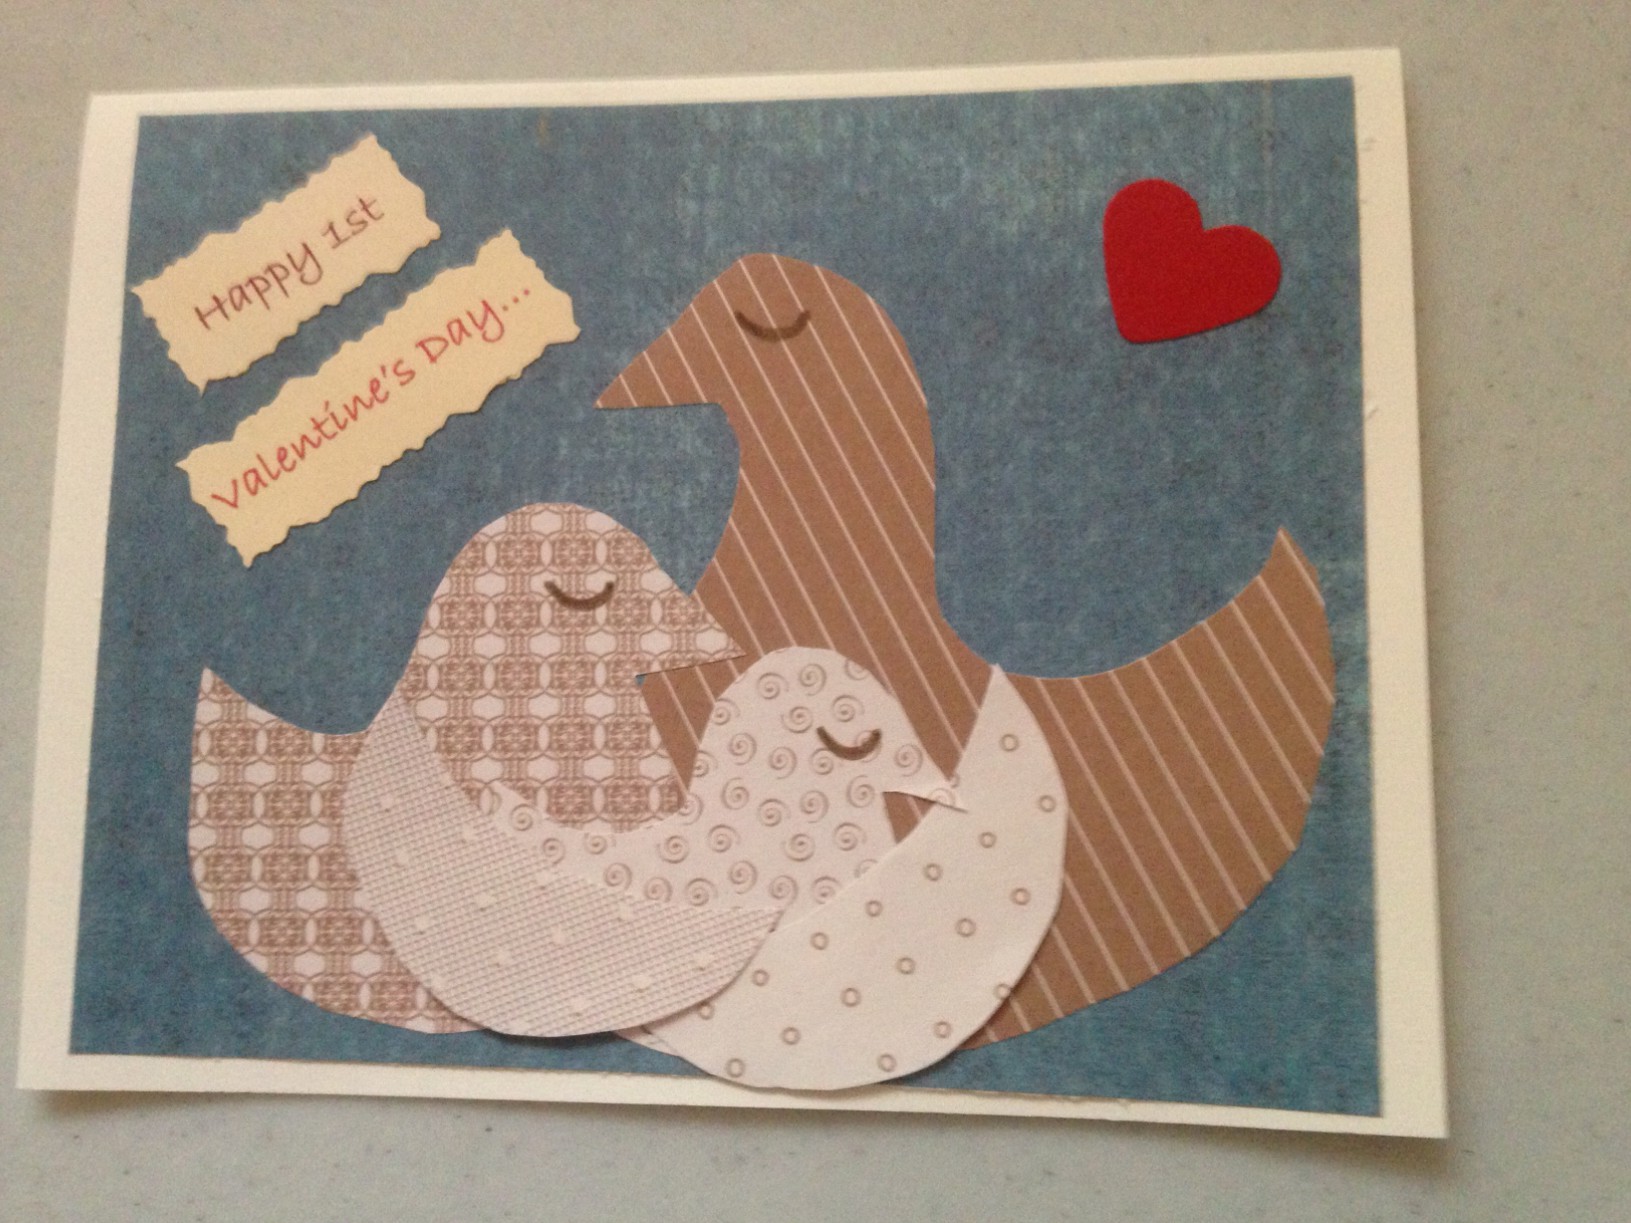
This was for a baby shower for a couple at church:

img_1085.jpg

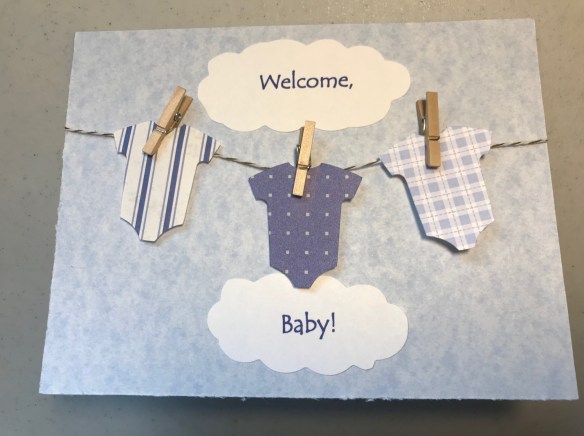
I had seen several ideas similar to this on Pinterest. The “onesies” were made with the Cricut machine. I learned you can make a reasonable looking cloud by cutting an oval or circle with scalloped scissors. I was a little afraid the twine would come loose, but I kept the card propped open on my table for a couple of days, and everything stayed put.

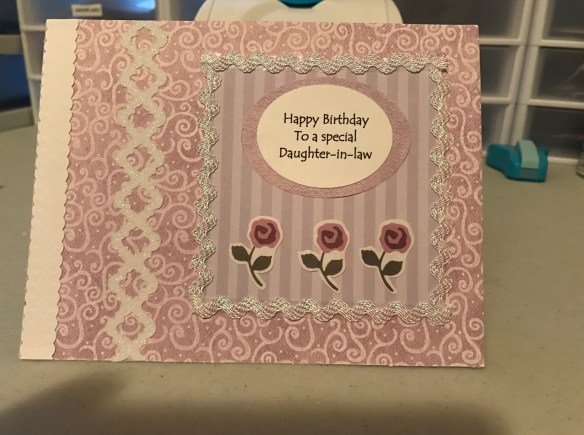
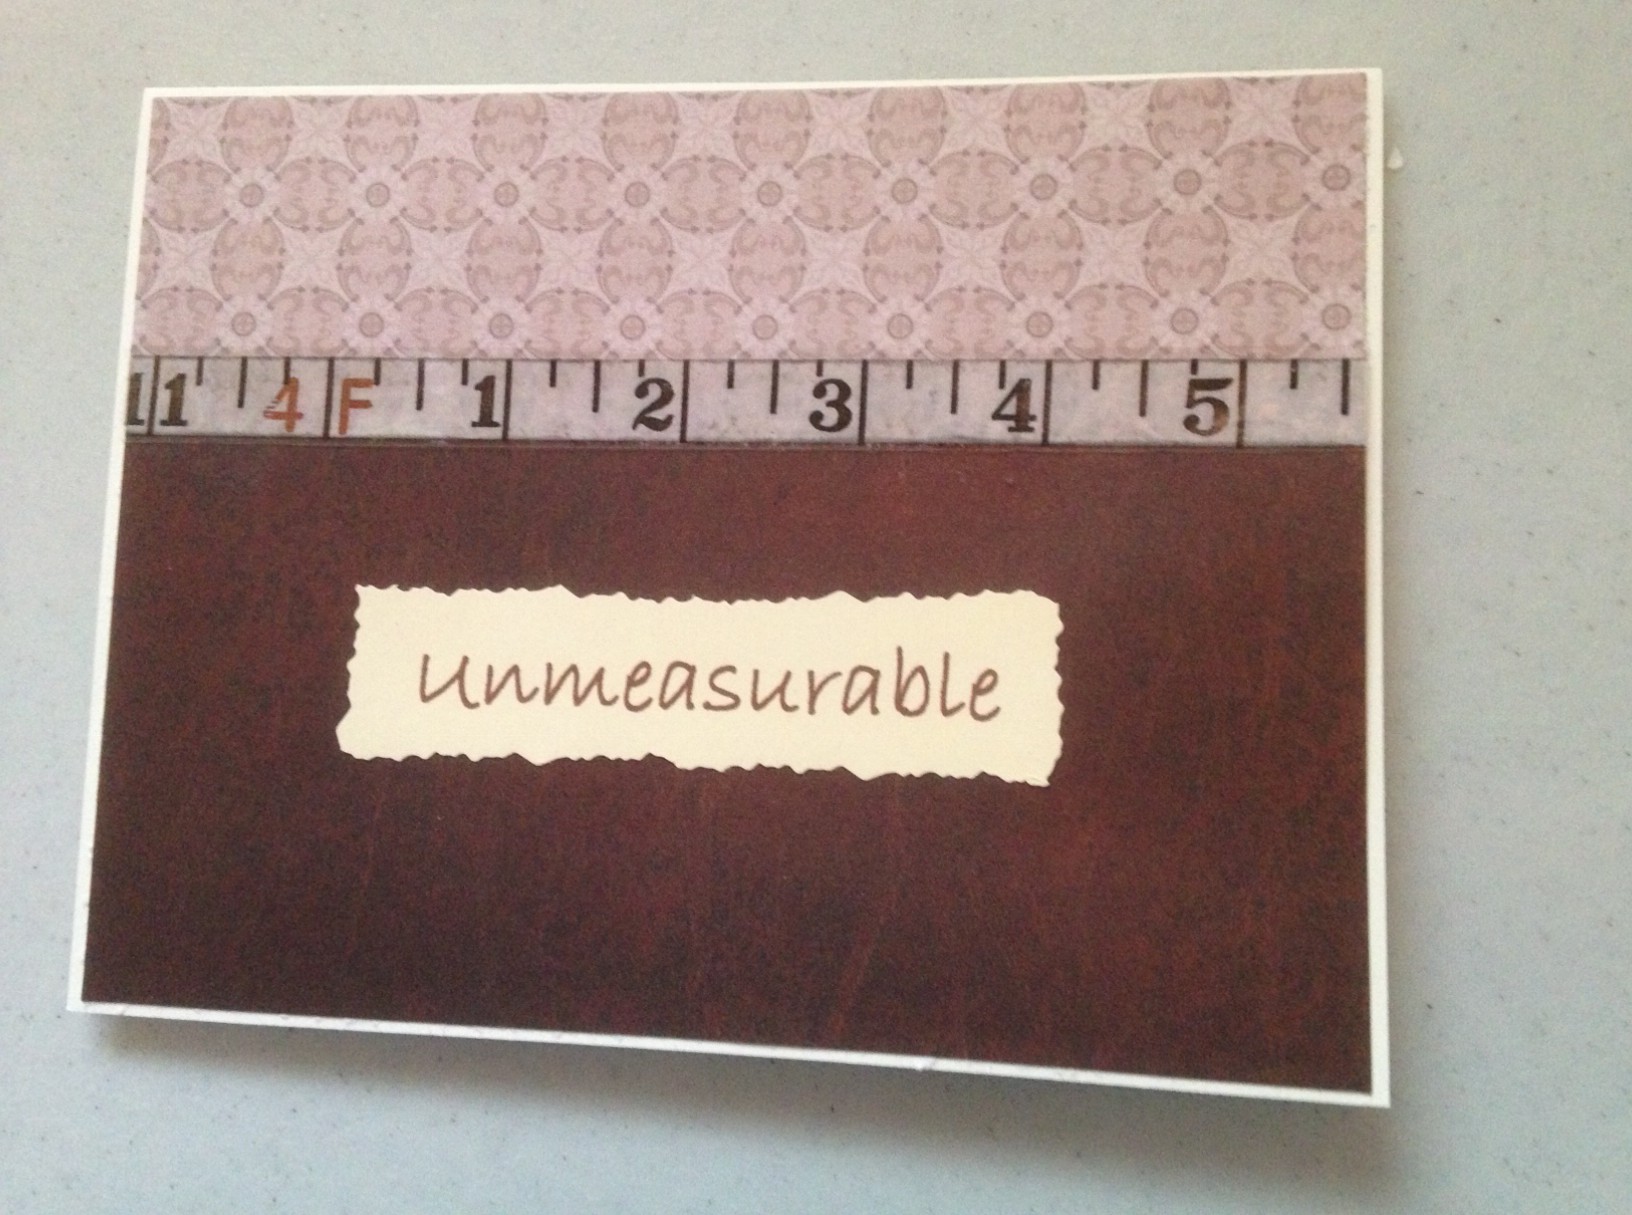
This was a thank-you card for a friend:

img_1130.jpg

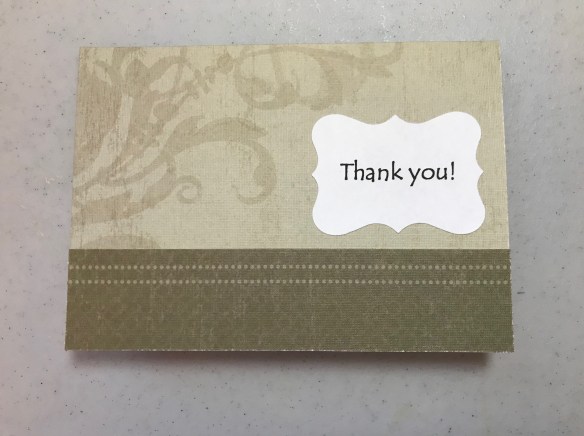
This was another instance where the paper itself was so pretty and had enough detail that adding much else would have been superfluous.

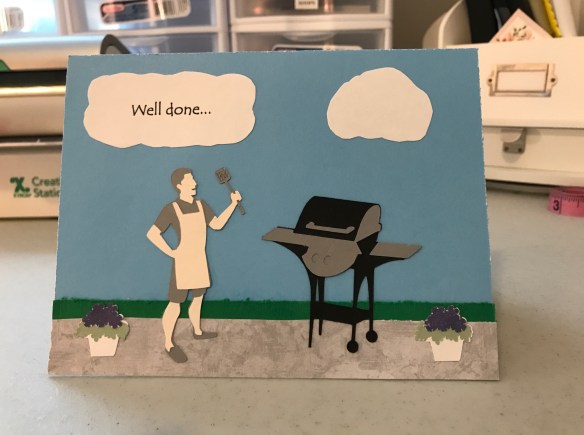
This was for a little boy in our church recovering from surgery:

IMG_1131

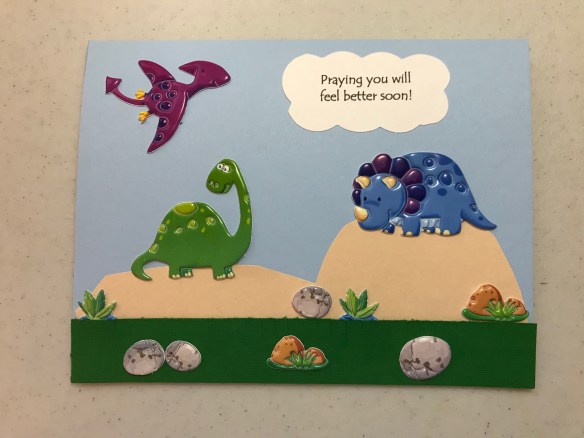
I asked someone who knew the family well if there was an animal or character he particularly liked, and they mentioned dinosaurs. None of the dinosaur shapes on the Cricut looked like what I wanted, so I used puffy stickers. I cut the grass and hills free hand and snipped across the strip of grass to make it look a little more 3-D. then I tucked a couple more packages of dinosaur stickers inside for him to play with.

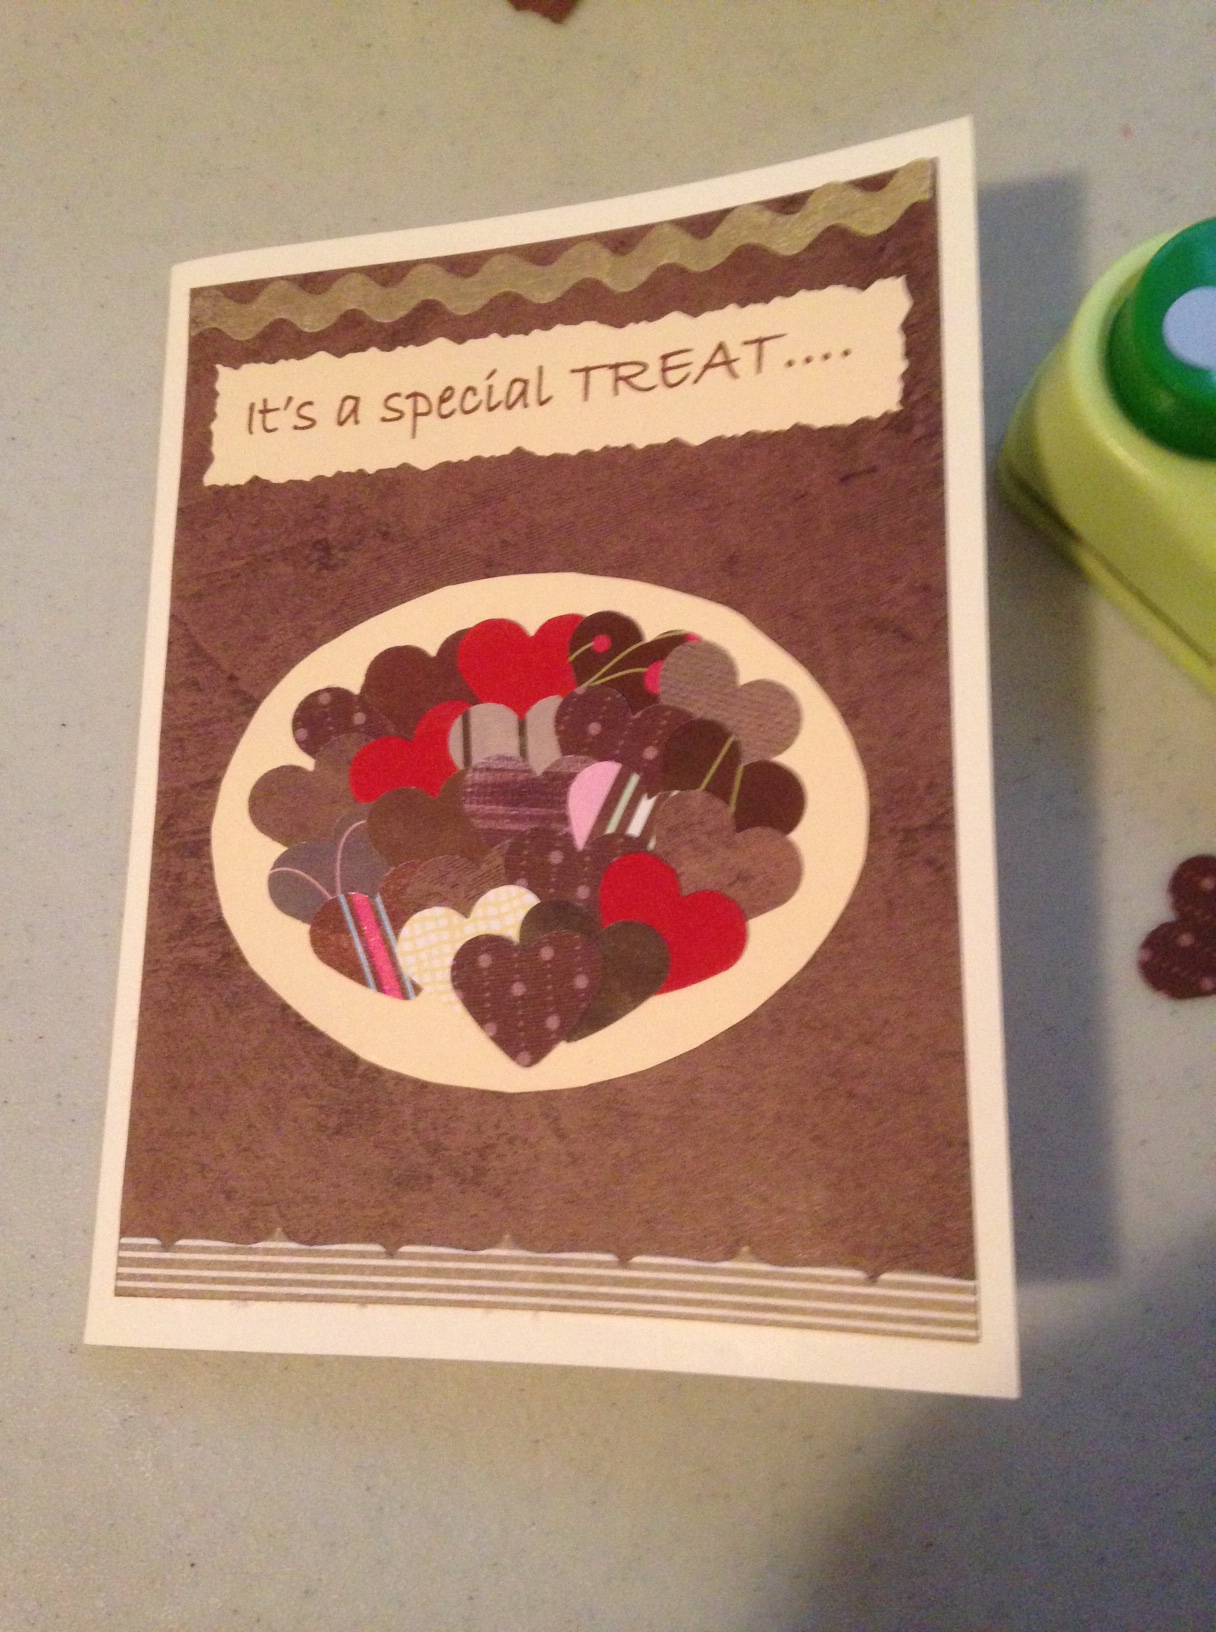
This was for Jesse’s birthday:

img_11561.jpg

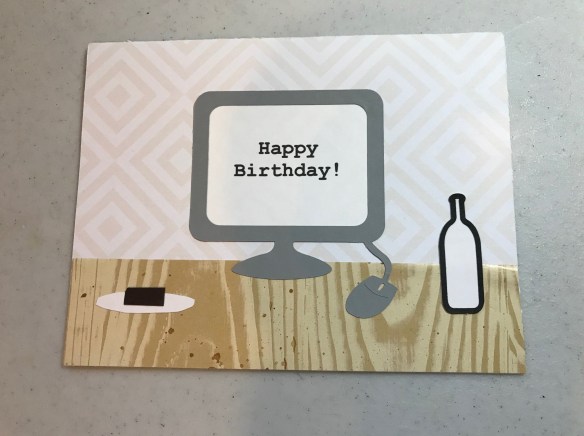
He is very much into computers – his work, his major, his classes, and his hobbies all revolve around the computer. So I wanted to reflect that. The computer shape was done on the Cricut, and the desk was a scrap of wood-grained paper I had on hand. I liked it better before I added the “snacks,” so I should have left well enough alone. But they also reflect him accurately.  🙂 The bottle was done with the Cricut and was supposed to look like the type of flavored water he drinks. The plate and brownie I did free-hand.

When I put out my autumn decorations, I realized there was a door I had no wreath for. And we can’t have that, can we? 🙂 Somehow I must have misplaced one, because I remember having a scarecrow one in addition to the one near the front door. Anyway, I remembered I had the same thought about needing another wreath last year, and even bought supplies for a burlap wreath, but didn’t get around to it then. So I found them in my craft room closet and worked on it bit by bit. It didn’t take all that long, but I had to work it into odd bits of time. I found a plethora of burlap wreath ideas on Pinterest. I found instructions for the burlap part here, and a helpful video tutorial here. The felt roses came from a site I had used before for them here. This is a much simpler way to make felt roses than many tutorials I’ve seen that tell you to cut multiple petals and sew them all together. I used a hot glue gun instead of stitches. I was really pleased with how it turned out!

I cut the leaves freehand out of felt and glued everything on with hot glue. I learned to do the bow when I worked part time for a florist friend in early married days.

True confessions: I didn’t realize until I got the burlap part all done that I hadn’t gotten the burlap loops even in length all around. So I put the flowers and bow on the place the difference was the most noticeable. Also, a couple of times while pushing the burlap through the wreath form, my thumb accidentally poked a hole in the burlap. But thankfully the loose weave that enabled the hole also enabled fixing it by just moving the threads around.

I’m trying to decide whether to put an initial or something on the other side. But for now I like it as is.

It felt really good to get some creative projects done!

Father’s Day Cards

I thought I’d show you the cards I made for this last Father’s Day.

This was for my step-father, adapted from an idea seen on Pinterest.

IMG_0238

I love that it’s simple but still makes for a nice design. The buttons were made on the Cricut machine. I toyed with using real buttons and thread, but I was afraid they might fall off in transit.

This was for my son. My grandson likes super-heroes, so I thought it was fitting for a super-dad. 🙂

IMG_0239

This was from one of the Cricut Design Space’s “Make It and Take It” cards, but I tweaked it a bit from what they had – they didn’t have the “Super” at the top, and their whole card was the size of the blue frame.

For my husband, I wanted something to do with grilling, so I searched the Cricut Design Space’s files for “grill.” Both this grill and the little man showed up, so I used both of them. The design kind of evolved as I worked. I cut little snippets with scissors in the “grass” so it would look like grass blades. I started to stick the figures in the grass, but we grill on our patio, so I used the textured-looking grey paper for the patio. I was going to put “Well done” at the top (a play on the idea of well-done food and well-done fathering), then decided I would put that in a cloud. I had everything centered in the middle but thought the cloud looked odd centered right over the figures as if it was about to rain on them. So I moved it to the side and added another for balance, cutting them both out freehand (I had typed the “Well Done” and printed it on cardstock, along with the inside sentiments of the cards). Then the bottom corners looked like they needed something, so I looked up flowerpots. This flower design actually had a couple of other layers on the flowers and leaves, but they were so tiny they didn’t come out well. I decided the flowers looked ok as is.

IMG_0240

That was it for this time. I think everyone liked their cards. 🙂

(Sharing with Made By You Monday)

Recent Cards

It has been a while since I’ve shared with you some cards I have made, so I thought I’d catch up. 🙂

This was for Mittu’s birthday. She likes purple and lavender, so I tried to incorporate those.

IMG_0087

This was for Timothy’s birthday. He is very much into anything on wheels right now, especially construction vehicles.

IMG_0140

Though I have been driving for decades, somehow I got the traffic light upside down…but when I noticed it, I didn’t want to try to peel it off and tear the paper underneath. I don’t think he noticed. 🙂

This card is the only one I have made on more than one occasion (only with different colors of paper), the occasion being a bridal shower. Since the recipients were in different states and didn’t know each other, I didn’t have to worry about them comparing notes. 🙂

IMG_0123

I got the idea from Pinterest, and the dress part of the card there took up more space and the top and bottom of the dress flared out more. But both the girls I was making this for are very slim, so I slimmed down the dress here. I ran white card stock through my Cuttlebug to get the embossed pattern on the dress. I printed off the label on the computer and used two different sized punches for it. If you turn the punch upside-down, you can position a phrase in the opening, though it is a little tricky to get it to stay centered and still while you punch the design.

Paper punch

I don’t have a steady hand for cutting, so punches help a lot. (Punches can be expensive, but craft stores often have them on sale 40-50% off, and with gift cards I’ve collected a good many.)

The next three were for Mother’s Day.

This one was for a friend, someone I consider a second mother:

IMG_0209

This was for Jim’s mom, who likes yellow:

IMG_0212

Even though I don’t care for yellow myself, this ended up being one of my favorite cards I’ve made.

Up til now, I’ve made the inside sentiment of the cards on the computer, printed them out, and cut them out, and glued them in, but I felt that came across a little tacky and made it look home-made in a negative rather than positive sense. I don’t do lettering or even write well, so I didn’t want to do anything by hand. I could run cards through the computer. But for now I decided to try embellishing the inside as well as the outside.

IMG_0213

This was for Mittu’s Mother’s Day.

IMG_0219

Sorry about the shadows! This was the only one I’ve used the Cricut on lately. If I had it to do over, I’d use the lighter color as the floral frame and the medium color as the background. But I didn’t think of that til a few hours after it was done. 🙂 I didn’t realize at first that the little flowers look like little faces:

IMG_0218

I have a Cards and Paper-crafts board on Pinterest where I go for ideas and inspiration. Sometimes, as with the bridal shower card, I’ll have a specific idea in mind before I start. Other times, like with the rest of these, I’ll look through the papers and embellishments I have in the colors or theme I want to use, and then ideas of how to put them together will arise. Sometimes I’ll scroll through the Cricut Design Space online either at their ready-to-make cards, or, as with the last card, I’ll search there for specific items, like flowers or sayings, and then put them together.

At any rate, this is a creative outlet I enjoy, and I wanted to share it with you.

Family Christmas Cards

I hope you had a special Christmas. We had a nice day with all the family here. Someone, I think my son or daughter-in-law, had the idea of putting our photos in stickers on the Christmas gifts so Timothy could help pass them out to the right person that way. He was very patient as we got breakfast and read the Nativity story, then passed out a few gifts to others, then said, “Baby presents?” like, “Hey, shouldn’t I be getting one of these?” 🙂

The last few years I have been making cards for my immediate family, so I thought I’d show you the cards I made for Christmas. As I scouted Pinterest for ideas, I noted that several I had pinned had snowmen, so I decided to go with a snowman theme.

For this one for my husband, I looked up “snowman template” and cut out this little couple, colored them with colored pencils, then decorated around them. The background paper has phrases from “The Twelve Days of Christmas” on it.

img_1365

This was for my oldest son. I used the Cuttlebug to emboss the snowflakes on the background. I love the perspective of this one (I can’t take credit for it – I saw it on Pinterest. 🙂 )

img_1371

This was for Jason. I love the cheeriness of this one.

img_1370

This was for Mittu. I was delighted to find wintry paper that had purple in it.

img_1368

This cute one was for Timothy.

img_1369

This was Jesse’s. I think I got something a little askew with the hat…

img_1372

This was for Jim’s mom. I had seen the idea for “JOY” with a wreath in place of the O, and changed it for a snowman’s face.

img_1366

Then I stayed with the same theme for our anniversary card with a different template:

img_1374

I used punches for some of the circles and squares and buttons and eyes, stickers in some places and markers in others.

Overall it was fun to do while listening to the Instrumental Christmas station on Pandora. Most of it was done after the toe injury and thankfully after I had almost everything else done but the cleaning, which my husband graciously did. I think they all liked them.

I’m working on some end of the year blog posts of books read this year, my favorites of them, and a wrap-up post for the Mount TBR Reading Challenge. I’m afraid they will overlap a bit. 🙂 And usually around this time I look back over some of my favorite posts of the year. So, as time allows, that’s what will be up the rest of this week.

Save

Cards

Someone commented recently that they’d like to see the cards I had mentioned working on, and I am happy to oblige. 🙂 When I make cards, I usually peruse my Pinterest board for cards unless I have an idea already. I try not to copy them exactly but rather just get ideas and inspiration.

Before the spate of Valentine’s cards last week, I made this for a lady at church to go with her baby shower gift. I used a cute little elephant punch I had gotten for Christmas, but it could be done with stickers or punches of anything that might look like a baby’s mobile.

img_0927

This was my Valentine’s card for my husband:

IMG_1528

This was for my oldest son. I think the brown hearts look like chocolate ones. 🙂

img_0980

This was for my middle son:

img_0986

The design on the butterfly paper was raised and velvety (flocked). I love the masculine feel of the tans and rich browns.

This was for my daughter-in-law:

img_0988

This was for my grandson – I think it is my favorite:

img_0987

This was for my youngest son:

img_0984

I should have made the jar from a different colored paper or outlined it so it showed up better.

This was for my mother-in-law:

img_0985

The monkey, branches, birds, and jar were cut from my Cricut. Most of the hearts were done with various sizes of punches. Everything was done with things I already had on hand. Anything with words I type out on the computer, along with the sentiments inside, then print them off all on one sheet and then cut them out and paste them. The Cricut Explore has various fonts but I haven’t quite figured out adding words with it yet. On the heart on my mother-in-law’s card, I turned my heart punch upside down so I could center the words where I wanted them before punching the heart out.

I’ve made cards off and on for years, but started making them in earnest when they got to be so expensive in stores. I had a lot of papers, cardstock, equipment, etc., accumulated from years of sales, coupons, and gift cards to craft stores, and felt I needed to either use it or get rid of it. Of course, I have to watch out for this kind of thing:

craft humor🙂 But I usually ask for craft store gift cards for my birthday and Christmas, so that supplies my habit. 🙂

So even though I started for economical reasons, I do enjoy being able to give something unique and personal. It’s a bit more pressure Valentine’s Day and Christmas when I am making cards for all the family at once, as opposed to individual birthday cards through the year, but I enjoy it.

Valentine’s Cards

I have an embarrassingly large supply of materials  to make cards. Most have been picked up on sales or with coupons. I have used some over the years to make personal cards or for projects for our ladies’ group and missionaries, but I have quite a lot on hand still. Often by the time I think of making a card for an event. I don’t have enough time. But this year I determined it make Valentine’s Day cards for the family, and I thought I’d show them to you. I perused my Cards and Papercrafts and Valentine’s Ideas Pinterest boards for inspiration and used a few there as springboards but came up with a few others on my own.

This was Jim’s:

IMG_1039

The key is a little 3-d sticker and the only thing I bought especially for these cards: everything else I had on hand. He’s enjoyed joking that keys to my heart can be bought at Hobby Lobby. 🙂

This was Jeremy’s:

IMG_1035

The inside said “…To wish you a Happy Valentine’s Day.” I think the brown hearts look like chocolate, and they’re a great way to get hearts on a man’s card so it’s more masculine looking than the pink ones I gravitate to. 🙂 I usually make heart-shaped chocolate cupcakes decorated with sprinkles or icing for Valentine’s Day, and I thought these were reminiscent of those or of chocolate candies. Most of the hearts of various sizes on the cards were made with punches.

This was Jason’s:

IMG_1041

The inside says “That’s our love for you,” meaning it’s so great it can’t be measured. I just realized last night or some time this morning that I didn’t have a heart on his. Sorry about that, Jason! Here’s one for you: 🙂

This was Mittu’s:

IMG_1044

The inside says “On Valentine’s Day and every day!” The little envelope was made with help from a template I found by searching online for “small envelope templates.” I have a neat punch that rounds off corners and used that for the words here. By the way, the words were all printed out on the computer with the Bradley Hand ITC font except for the letters for “LOVE” here, and those were from a page of punch-out letters. My own handwriting, I’m sorry to say, would not make for a pretty card. The words on the other cards I cut out with a scissors with a torn-paper-looking edge. That one is a little more forgiving than, say, a scalloped edge. I have a hard time cutting in a straight line, so this particular scissors helps. I have a mini paper cutter for longer straight lines.

This was Timothy’s:

IMG_1042

The inside says, “To our favorite snuggle buddy.” It was inspired by this pin, but when I tried to click through to the site to see if the card maker had instructions or a pattern, I couldn’t find the original site, nor could I find it by searching Google using the terms I thought I had originally found it with. So I had to wing it (pun intended. 🙂 ). Then I realized this card was going to be from both my husband and I, so I needed more than just one adult with the baby bird.

This one was Jesse’s:

IMG_1040

I think the inside just said “Happy Valentine’s Day!”

With the last two, I was running out of both time and ideas, so they are somewhat similar. This was Great-Grandma’s (or Mom, to my husband and me):

IMG_1046

Sorry about the shadow on this one. The inside says, “Your example has taught us how to love….May we show you as much love as you have shown us.”

This was for Jesse’s girlfriend, Meaghan:

IMG_1045

All of the borders were from packages of stick-on strips – very handy! And Hobby Lobby has them on sale 1/2 price pretty frequently in the scrapbooking section.

And on the back of each card was this stamp with either Mom, Grandma, or Barbara written in accordingly:

IMG_1047

They were a lot of fun to make, though they did take quite a bit of time. Actually once I decided what to do for each one and chose the decorative papers, it didn’t take long to put them together: the decision-making was the hardest part.

I’m hoping this will jump-start me into making more cards rather than buying them this year. It will probably depend on how much time I have before each occasion and whether I remember to start on then in time. But I think they add a nice touch.

Occasionally I’ve thought about starting an Etsy shop to sell things like this. But I’d also like to do more writing and various other things, so I am not sure of which way the Lord would have me use my time yet. So for now I’ll just do them as I have time for the family and think about the possibility of expanding on them later.